Exporting and Importing CDRouter Results
CDRouter data can be easily shared between systems using CDRouter’s export and import features. This article covers how to share results and testing resources between systems.
Sharing results with the QA Cafe support team?
Export your results using the steps below and send us the original
.gzarchive file. Sending individual files (eg. logs, packet captures, etc.) will make it more difficult for the support team to analyze and respond to your questions.Do not unzip the
.gzarchive before sending — extracted data cannot be used by the support team.
Export Format
CDRouter uses a specialized .gz archive format for all exported resources.
When an archive is imported into another CDRouter system, its contents are
reproduced exactly as they appeared on the original — the same results,
configurations, packages, and devices.
This makes it easy to share work across distributed teams. Users in different locations can maintain identical CDRouter test topologies, exchange archives, and rerun the same tests as if they were operating from the original system.
Note that CDRouter export archives are not conventional gzip files and should not be extracted with standard archive utilities — use CDRouter’s import tool instead.
Exporting Via the Web Interface
The following testing data can be exported from a CDRouter system:
- Results
- Configurations
- Packages
- Devices
Multiple resources can be exported together in a single archive, making it easy to transfer a collection of configurations, packages, or results to another system.
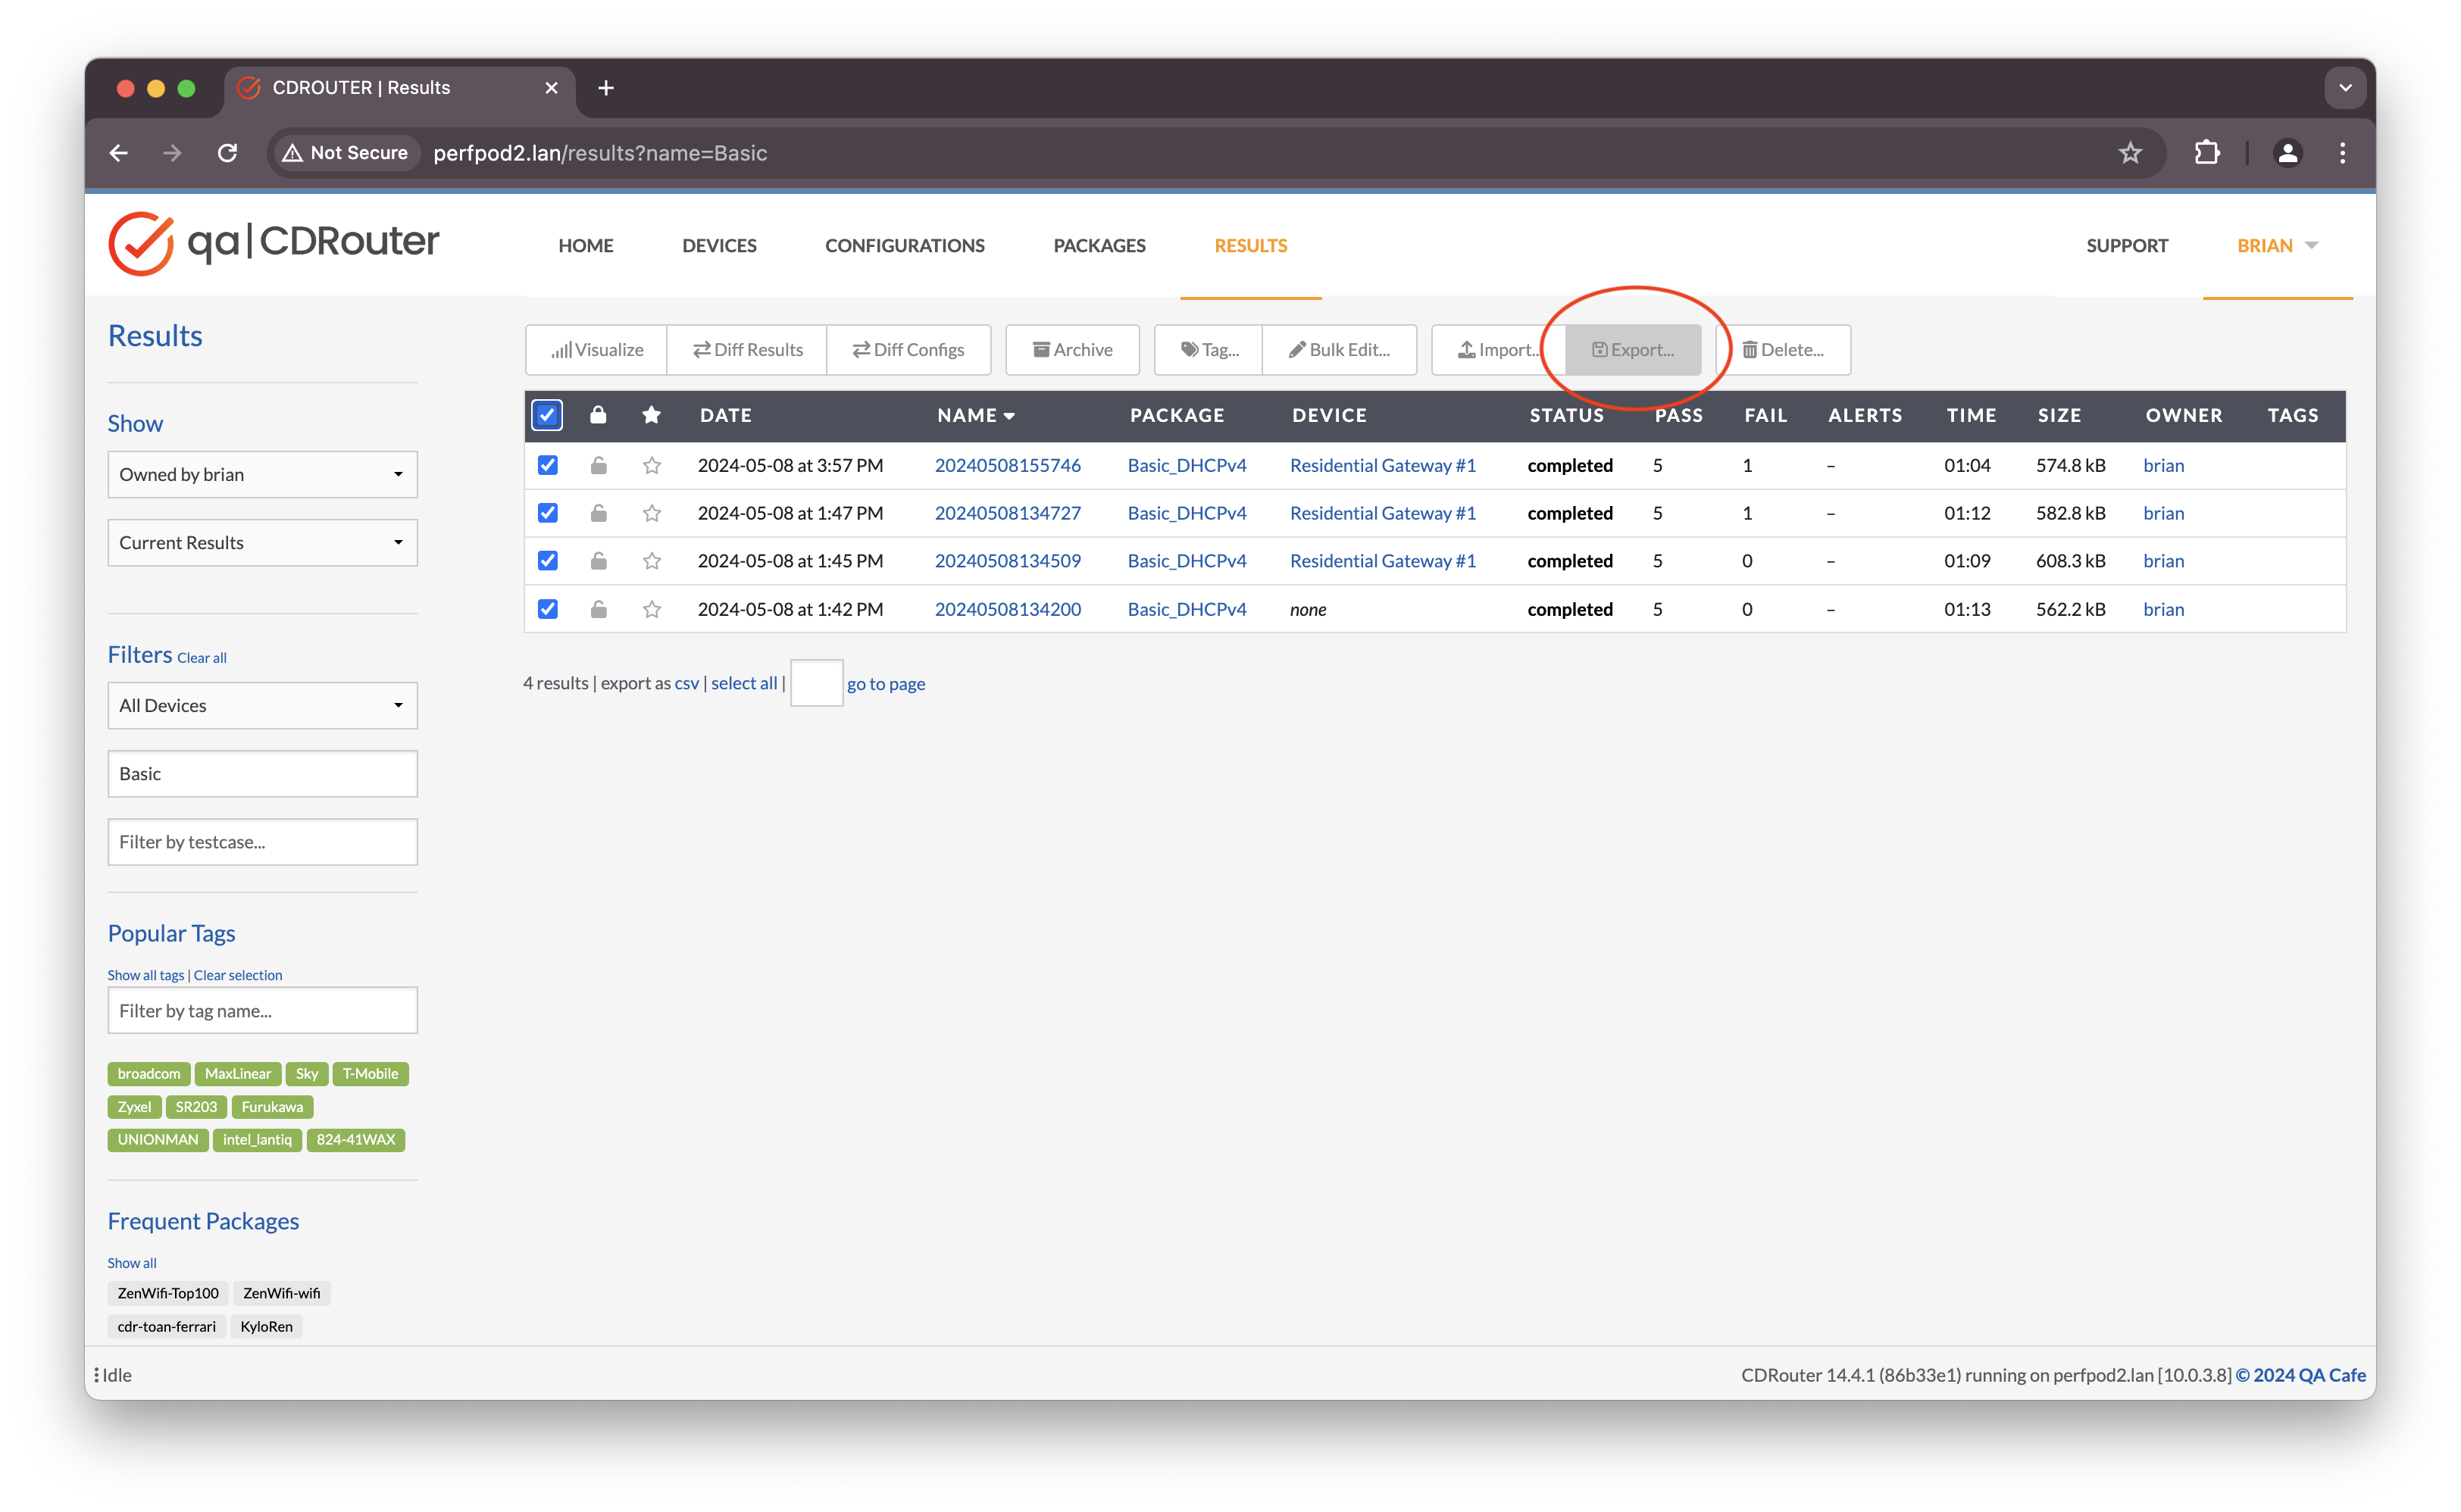
Results
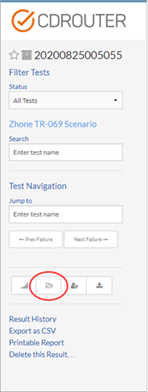
To export a result, click the export button on the result’s page:
![]()
To export multiple results:
- Go to the main Results index page.
- Select each result you want to export.
- Click the Export button in the toolbar.
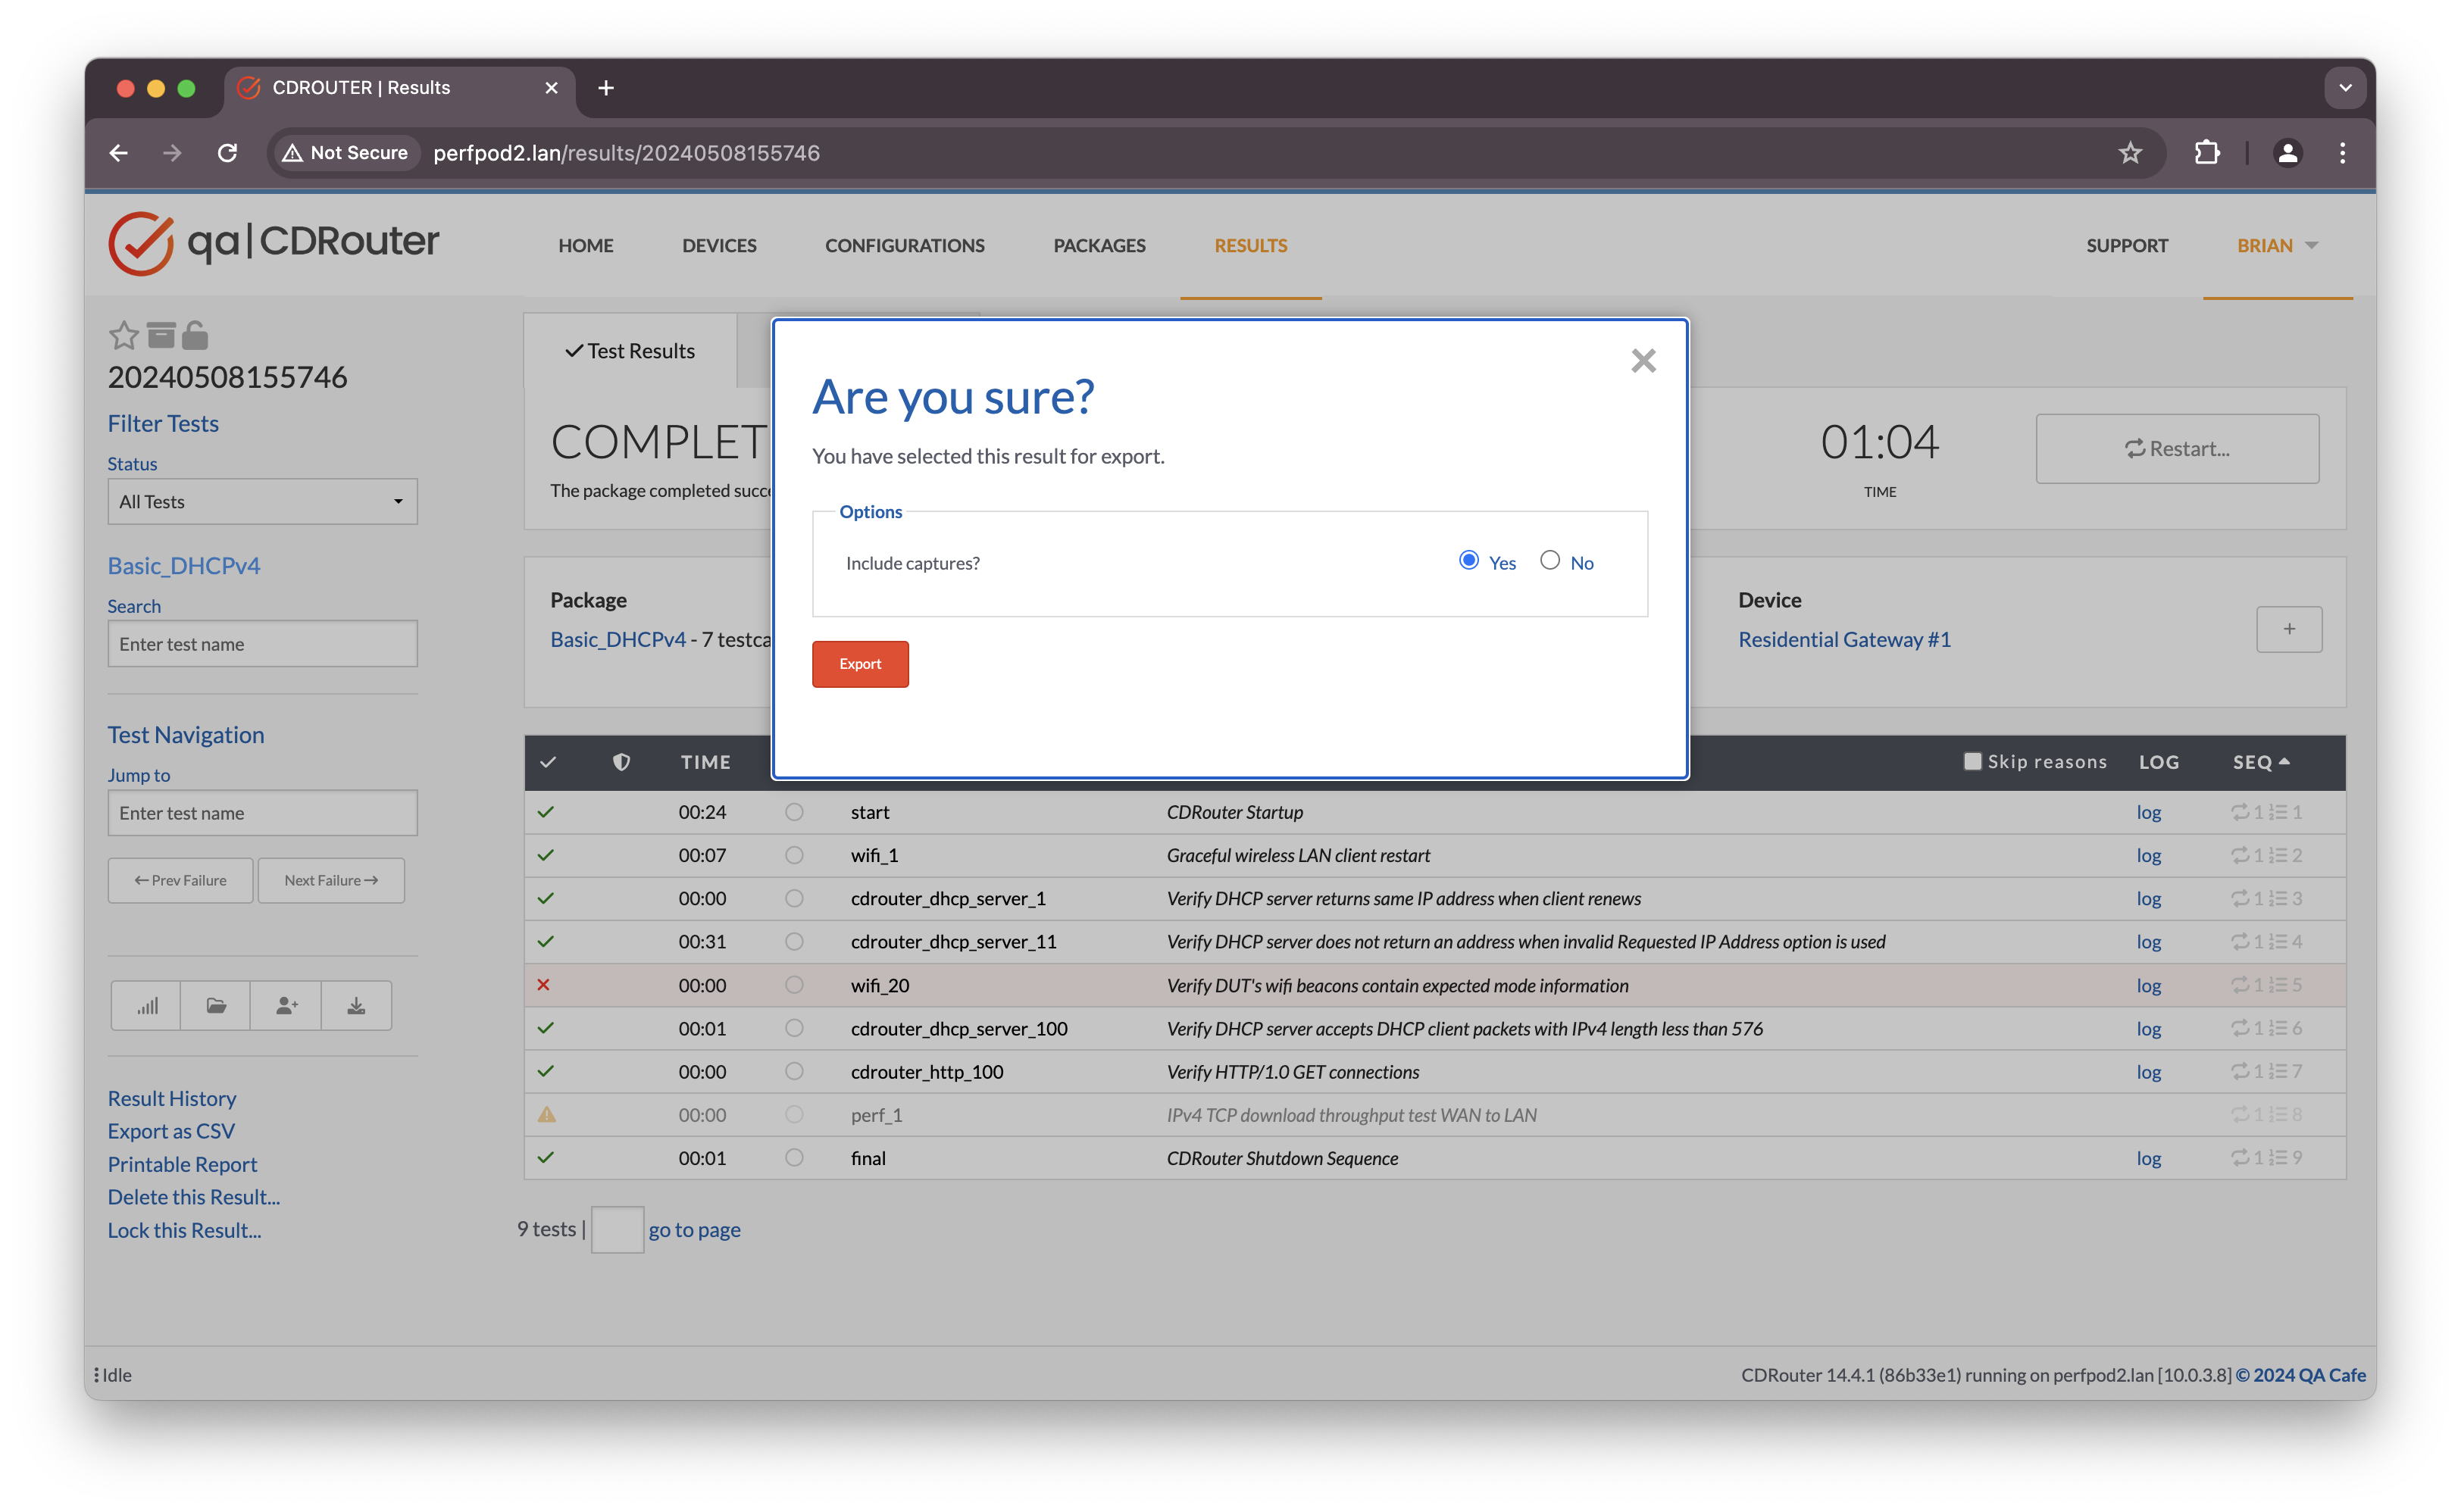
A result export archive contains a snapshot copy of the package, configuration, device, as well as all test logs and capture files associated with that result. Capture files can be optionally omitted to reduce the archive size.
NOTE: When sending results to the CDRouter support team, please include packet captures in your export archive.
Packages, Configurations, Devices
Individual packages, configurations, and devices can be exported from their respective index pages in the CDRouter web interface. To export one or more items, select the checkboxes next to the items you want to export, then click the Export button in the toolbar.
Note that a package export archive includes a snapshot copy of its associated configuration and device.
Importing Via the Web Interface
CDRouter’s import tool can be accessed from several places in the web interface:
- Click the Imports link in the Admin menu.
- Click the Import button on the configurations, packages, or results index pages.
- Click the Drag & Drop Here area on the home page.
The import process begins when a valid export archive is selected or dragged onto the target area.
There are three steps in the import process:
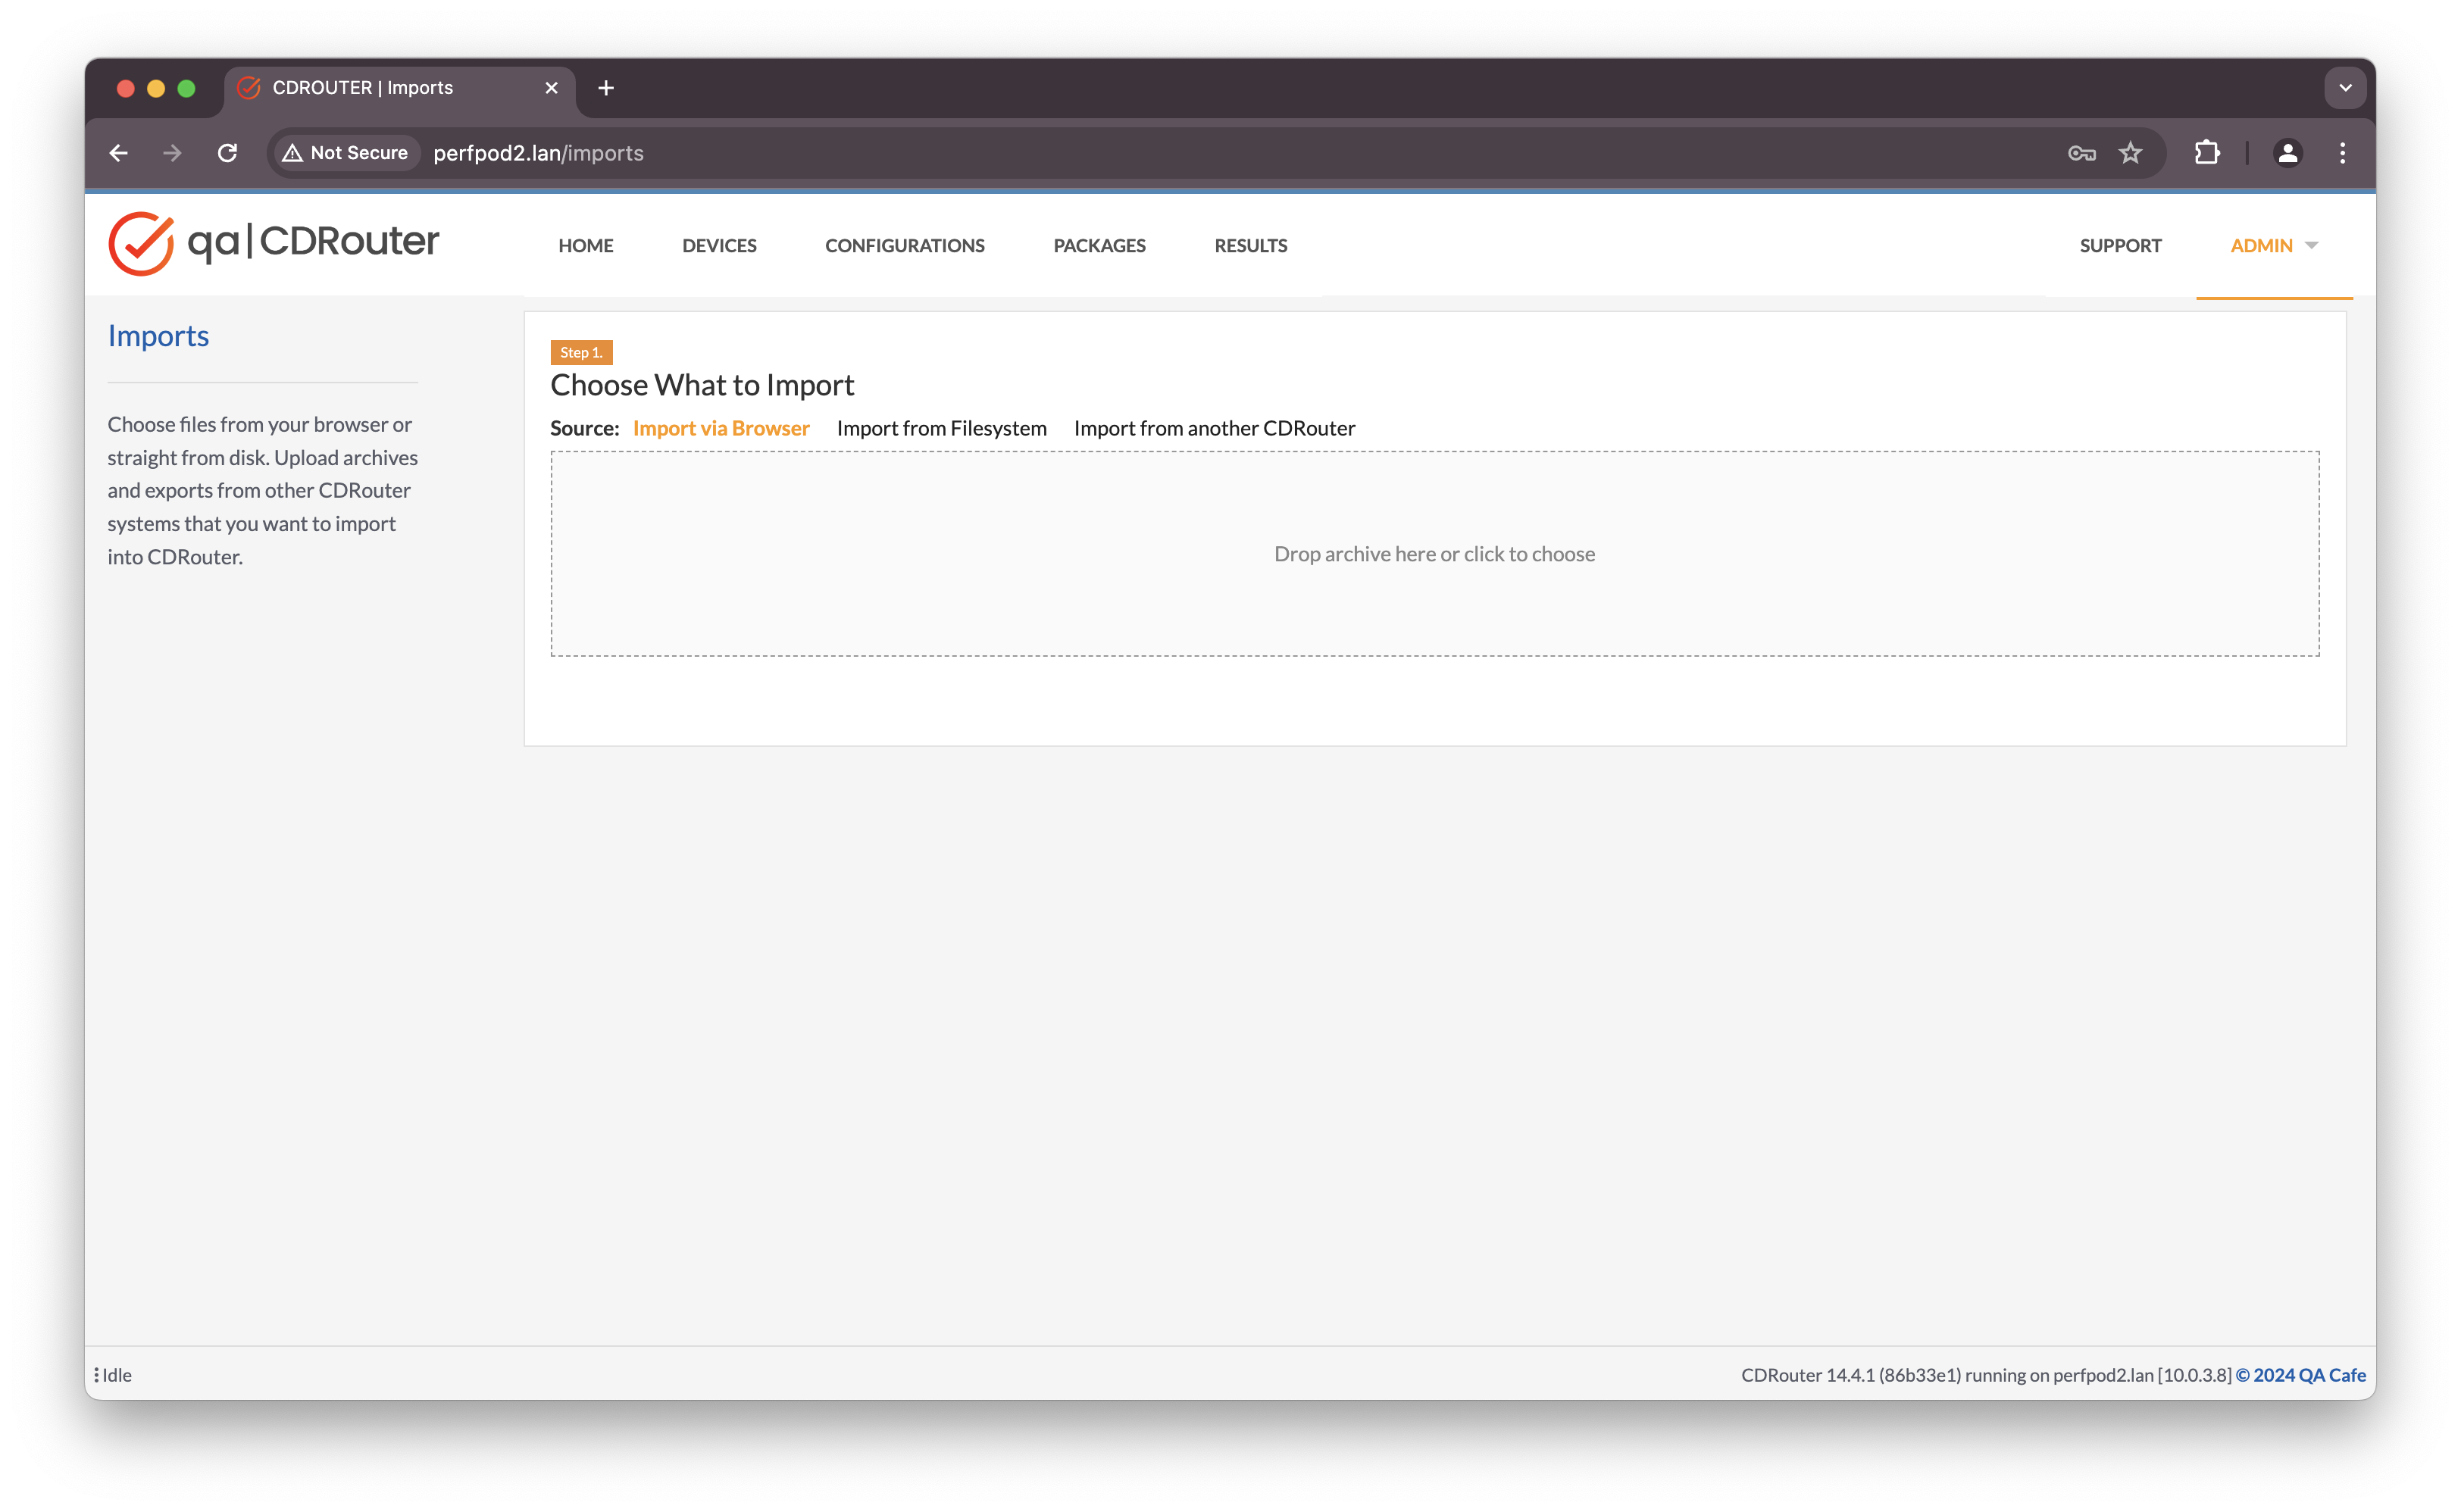
Step 1: Choose What/How to Import
There are three ways to import resources:
- Import via Browser: Import files from your local system using drag and drop, or by clicking the drop target to open a file browser.
- Import from Filesystem: Enter the full path to an export archive that has already been manually copied to the CDRouter system but not yet imported.
- Import from another CDRouter: Import resources directly from another CDRouter system by entering its URL.
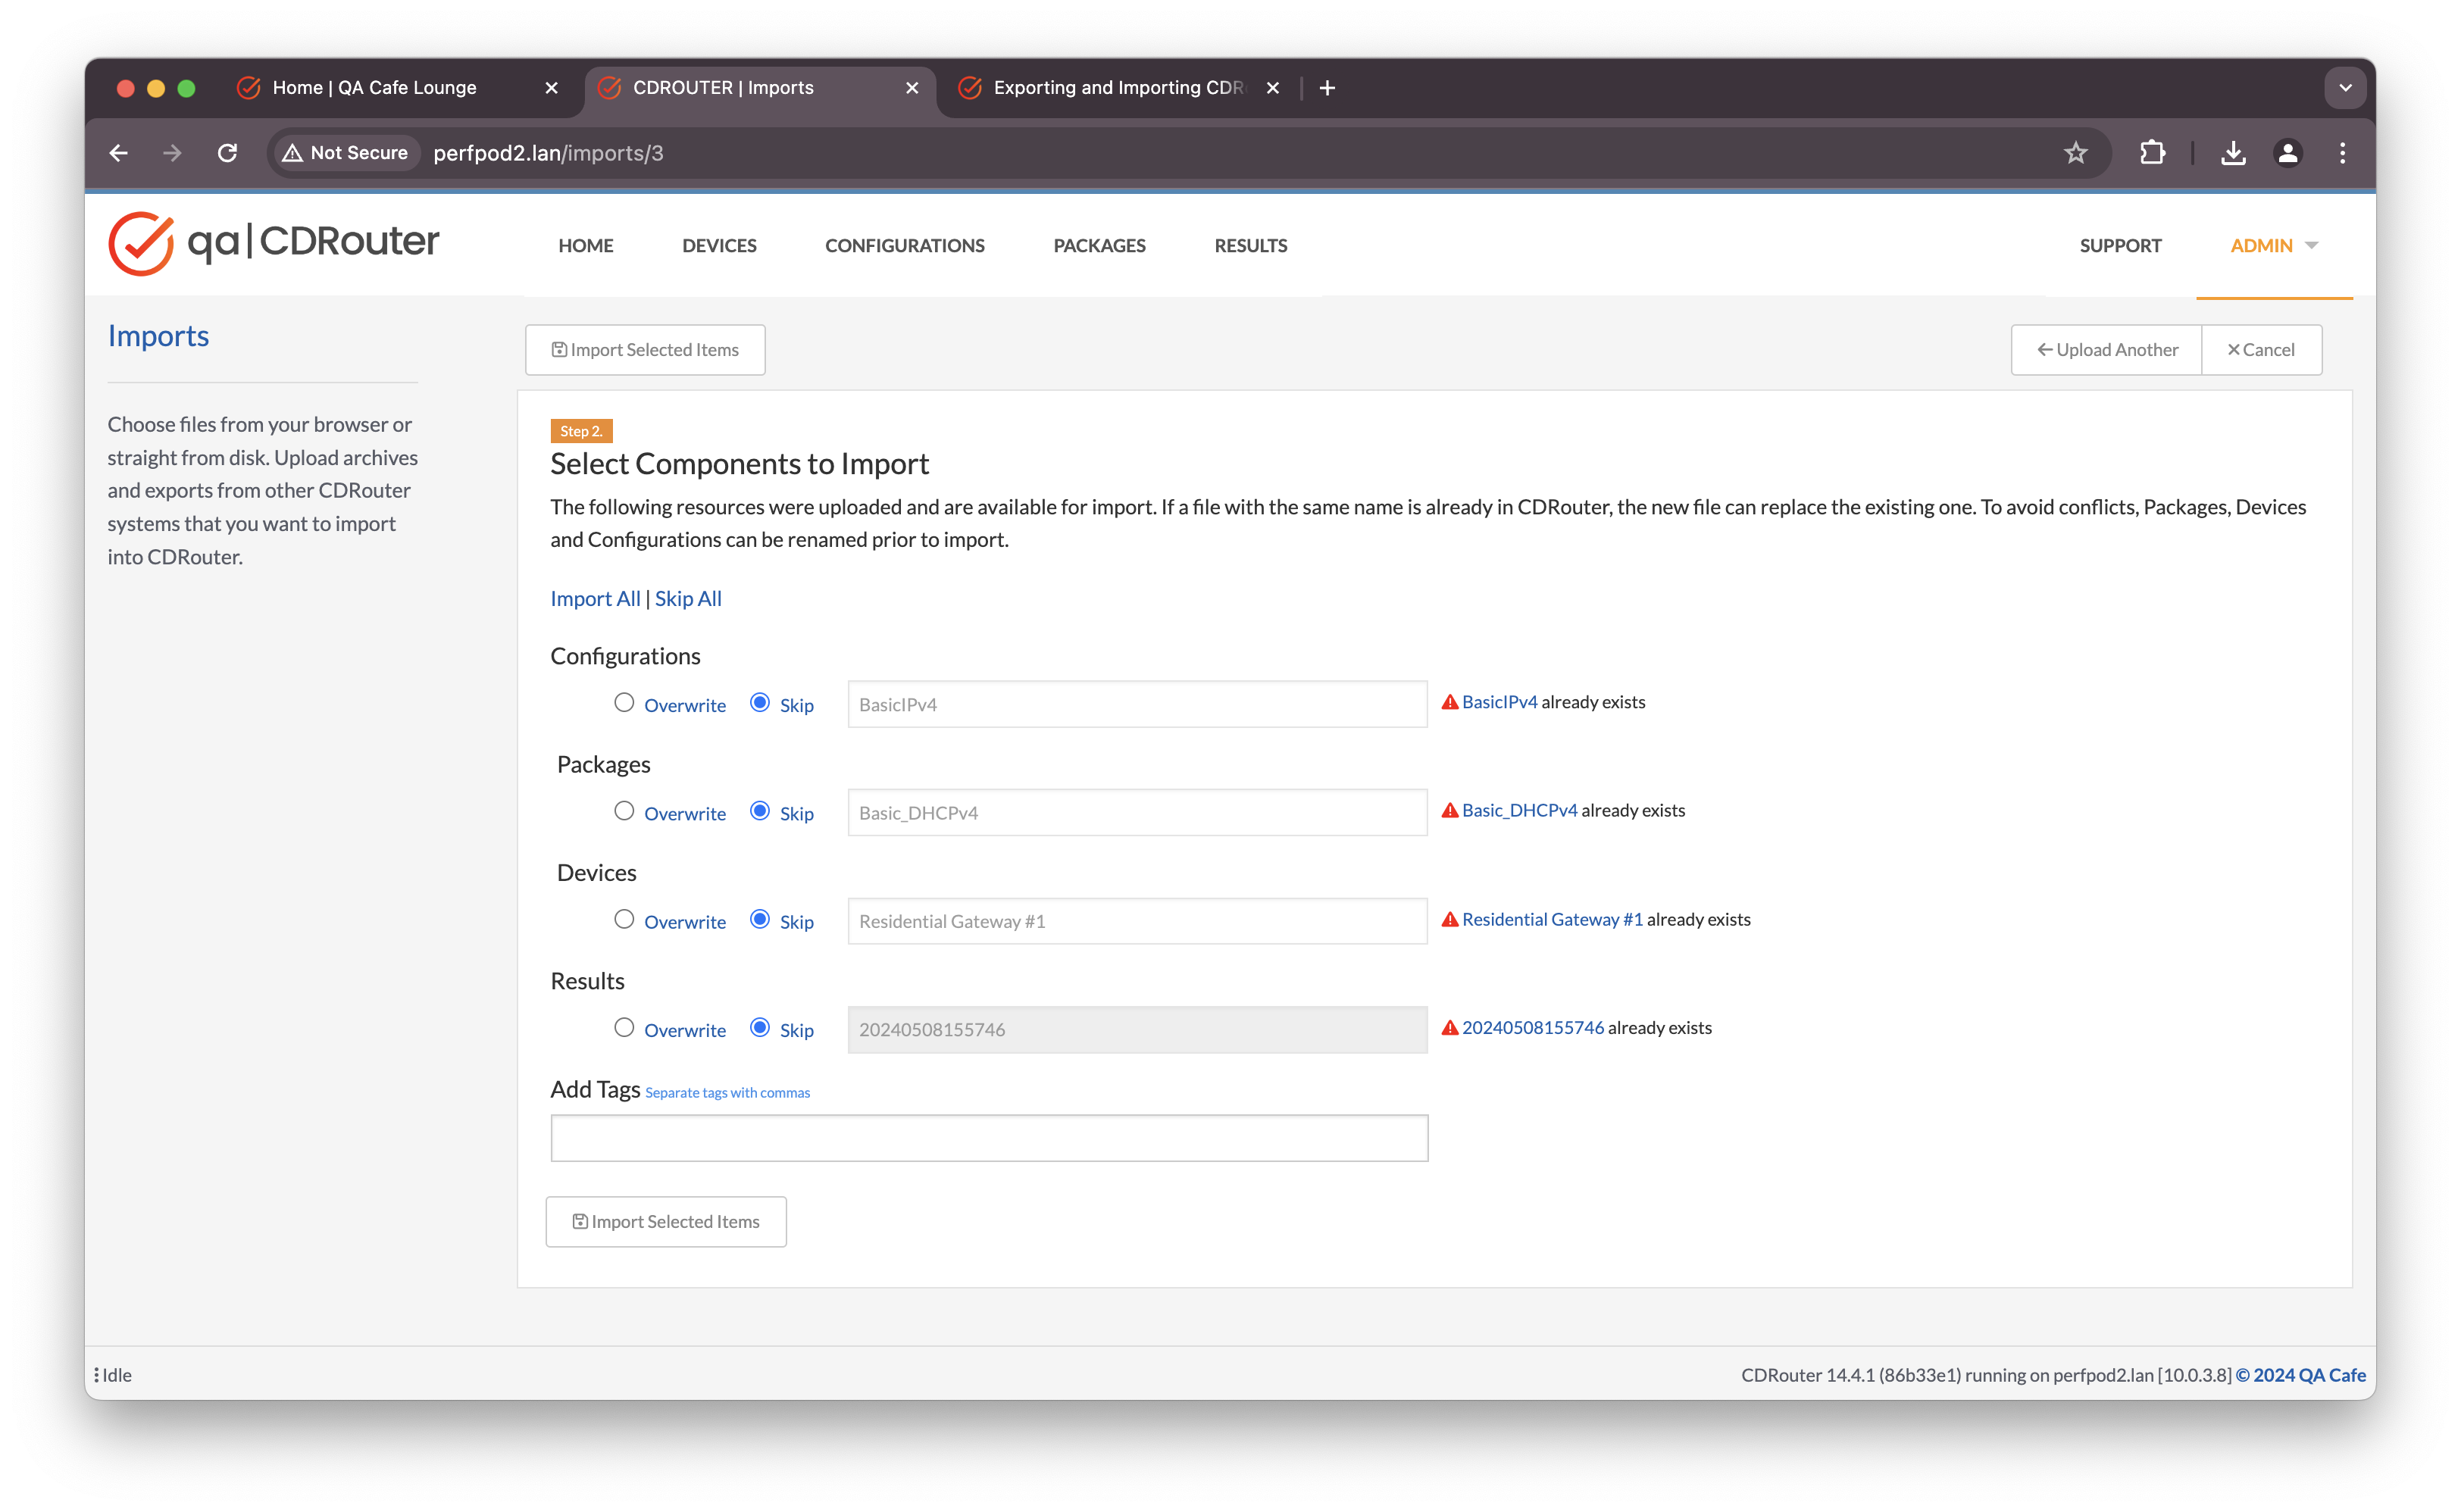
Step 2: Select Components to Import
Review the components contained in the archive. You can select which items to import or skip, and rename components before proceeding. Enter optional tags to be added to each imported resource.
When the import is completed, a link to each item will be displayed so you can access them immediately.
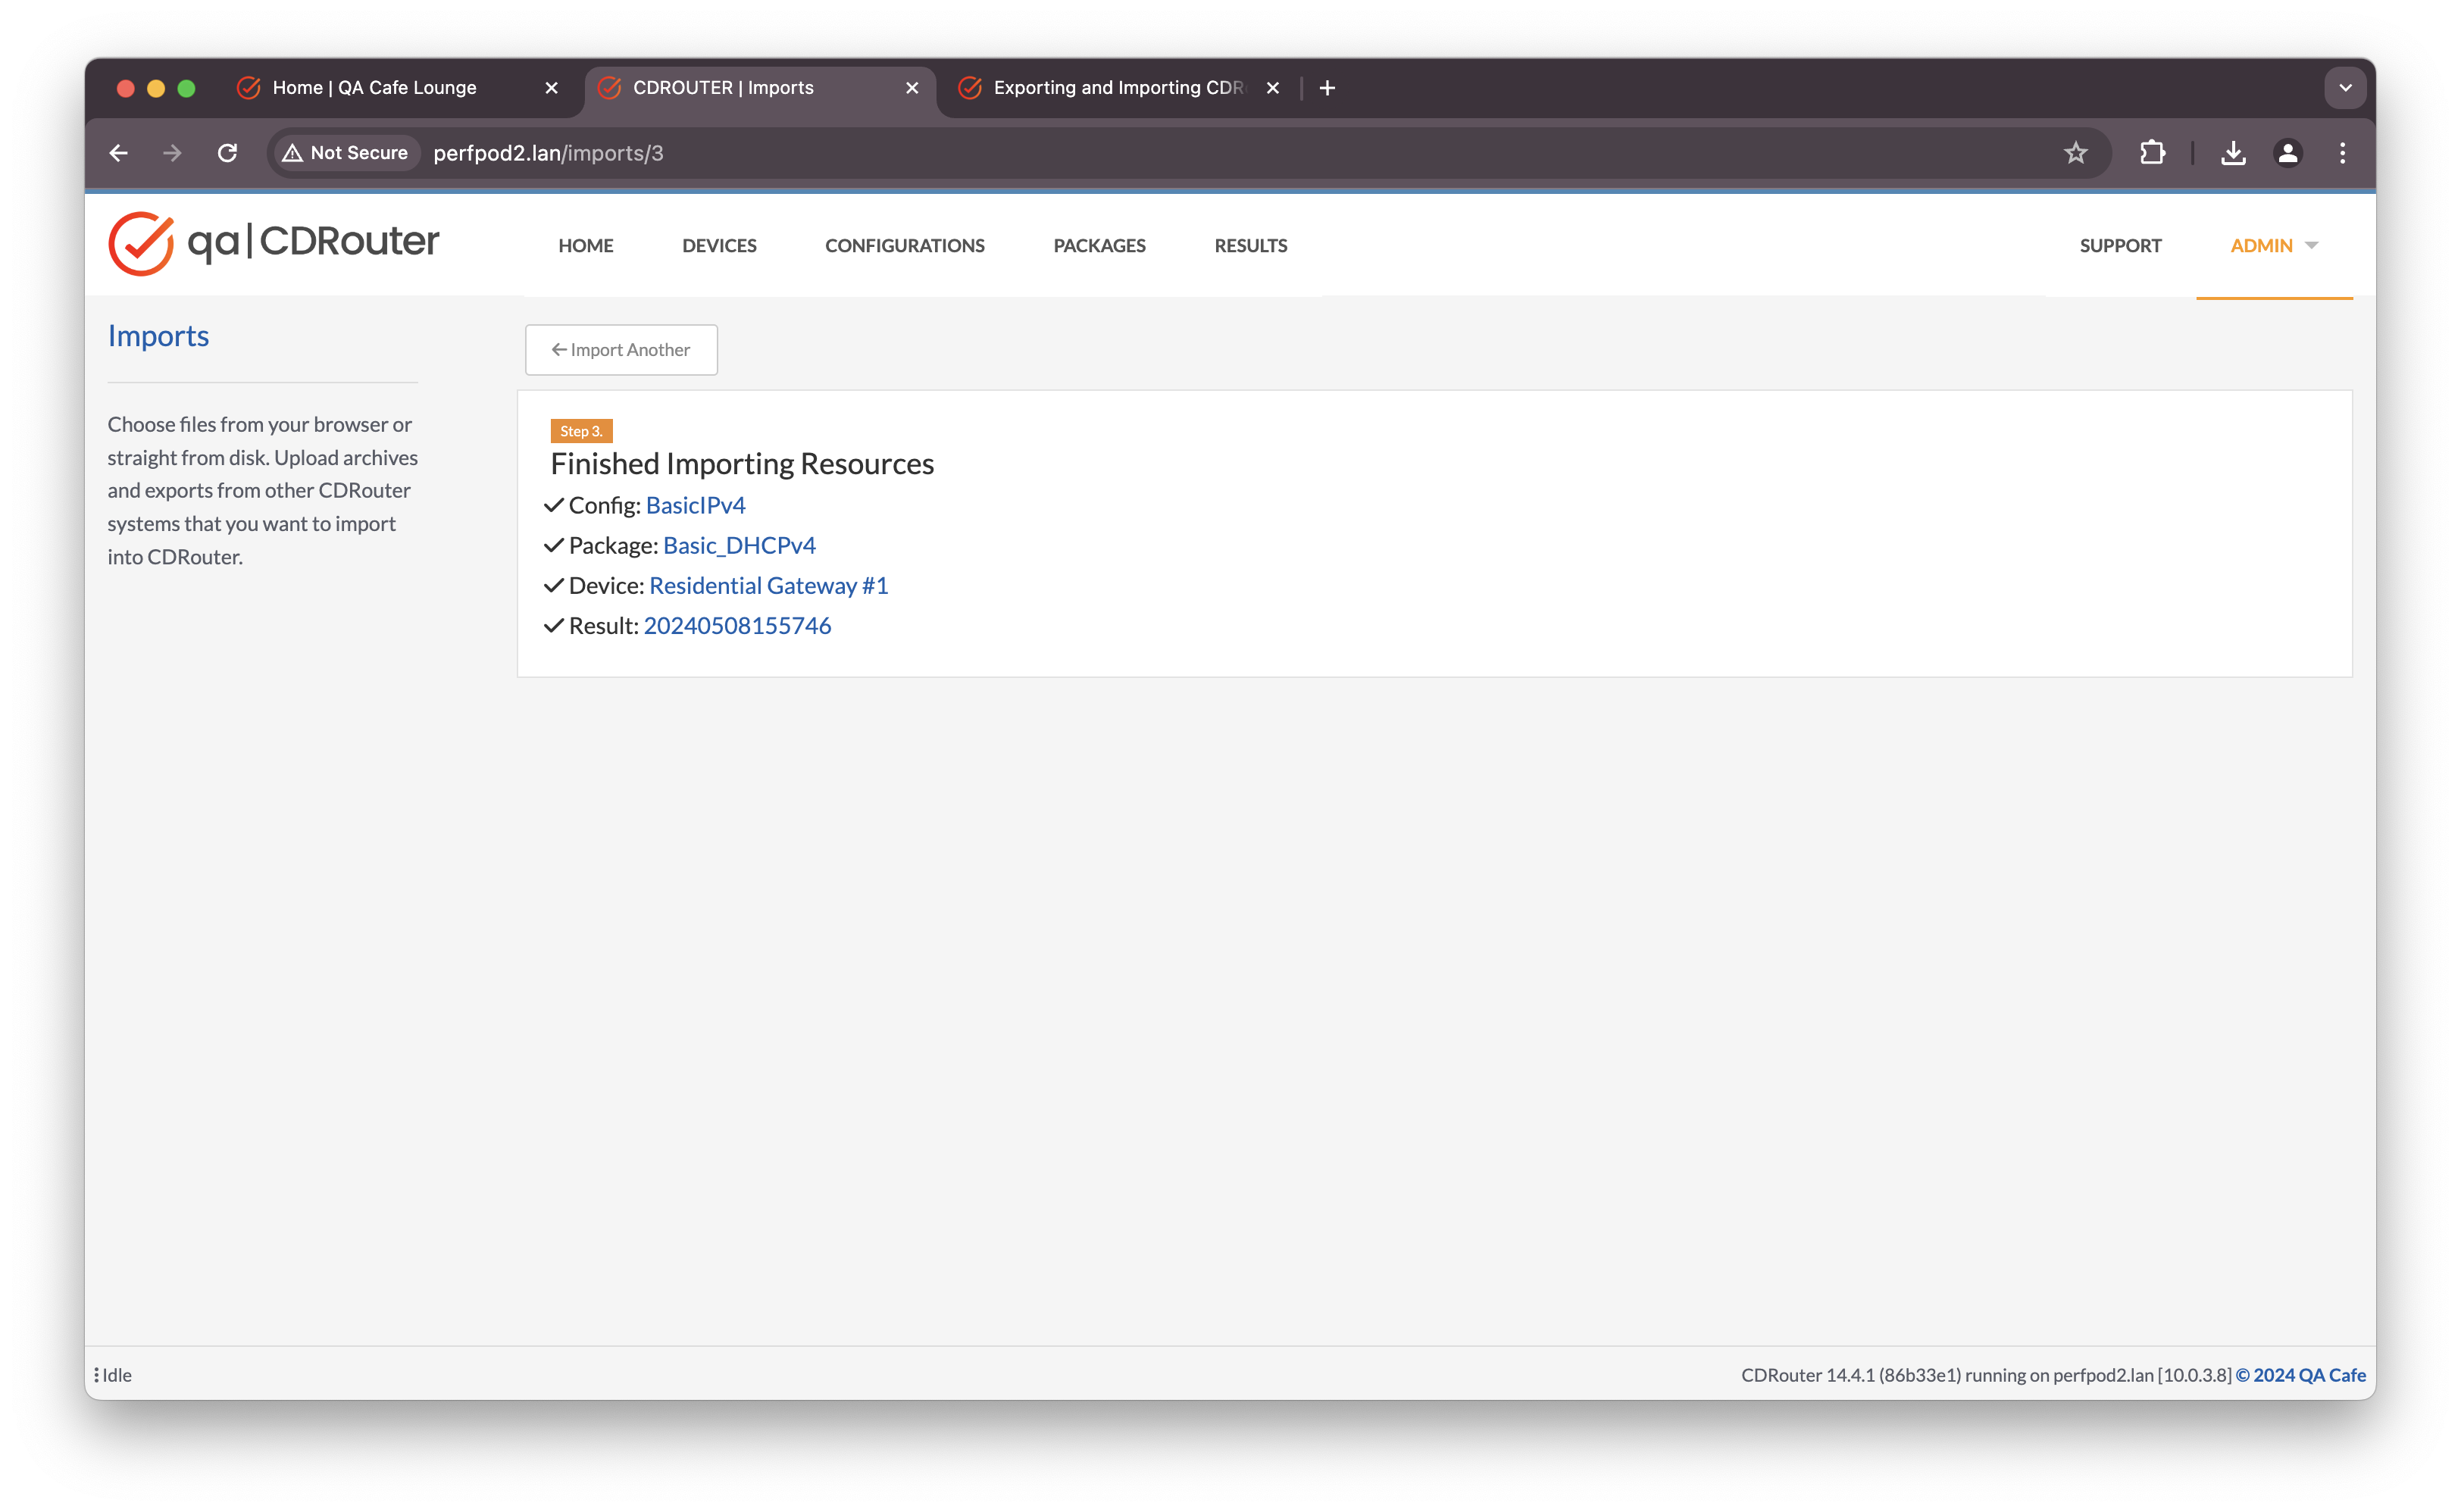
Step 3: Finish Up
Confirm your selections and complete the import. Imported items will appear in their respective index pages and will be tagged with import for easy identification.
Downloading Raw Test Results
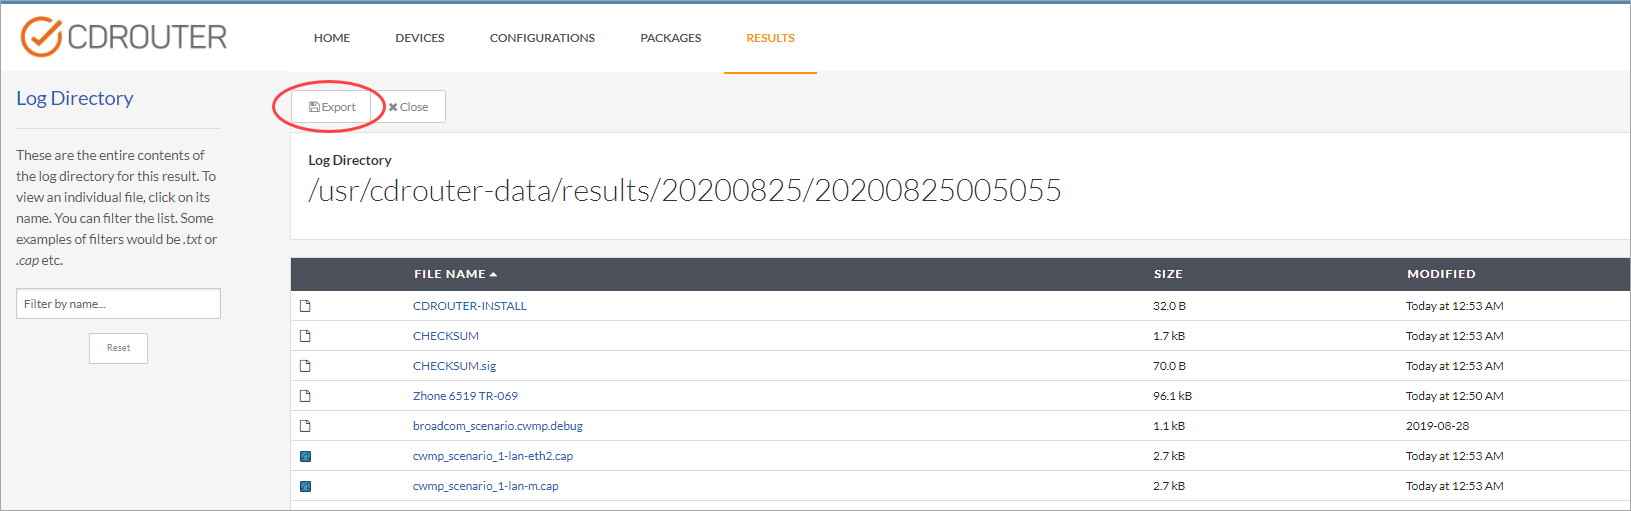
If you need access to individual files rather than a full CDRouter export archive, you can download raw logs and packet captures directly via the Log Directory. Click the Open Log Directory button on the specific results page:
On the Log Directory page you can filter and download files for a specific
test, as well as the configuration snapshot and any other files generated
during the test run. Click Export to download a .zip archive of all
result files.
Note that raw .zip downloads from the Log Directory are not compatible
with CDRouter’s import tool. Use the standard export workflow described above
when you need to transfer or share complete results.