The CDRouter Device Manager
Devices in CDRouter
Devices in CDRouter provide a powerful way to organize and manage test packages and results associated with a specific device.
Each entry on the Devices tab stores key details typically printed on the physical device—such as default login credentials, Wi-Fi SSID and key, MAC address, serial number, and more. This allows you to access important device information remotely, even when the device is not physically accessible.
In addition, Devices allow you to remotely connect to the device’s web-based management interface, enabling configuration changes, access to diagnostic information, and reboot control.
Adding a Device
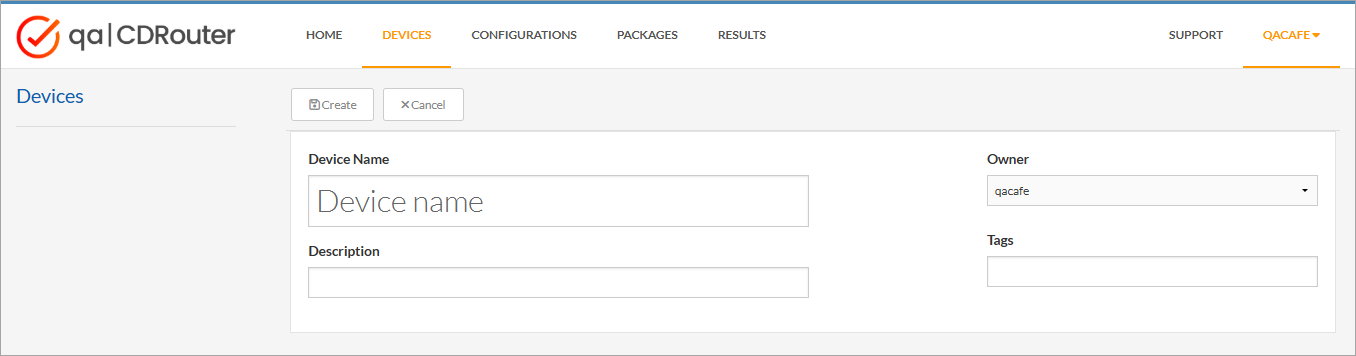
Click on the Devices tab at the top of the CDRouter web interface. This page shows a list of all devices currently in the system. To add a new device, click New. You can give the device a name, add a description, and assign tags. Once you’ve filled out the device information, click Create to save it. Your new device will now appear in the list.
Remote Device Management
If CDRouter is connected to the LAN side of your device, you can use the Device view to remotely access its web-based management interface through your browser.
To enable remote management, click Edit on the device and fill out the Management section with the following:
-
Management URL – The URL used to access the device’s web UI. This is the same URL you would use if you were directly connected to its LAN port (e.g.,
http://192.168.1.1). -
Interface – Select the CDRouter interface that is connected to the device’s LAN.
-
Address – Choose an IP address and prefix in the same subnet as the device (but not the same address). CDRouter will configure its interface with this address so it can reach the device. Example:
192.168.1.100/24. -
Power On / Power Off Command (optional) – These fields allow you to enter a user-defined command or script that powers the device on or off. This may access the device itself or a remote-controlled power supply (via HTTP, SNMP, Telnet, SSH, etc).
If you purchased the Advanced Accessory Pack for the NTA3000, use these fields to run the built-in
cdrouter-powerutility to control the power outlet connected to your device.
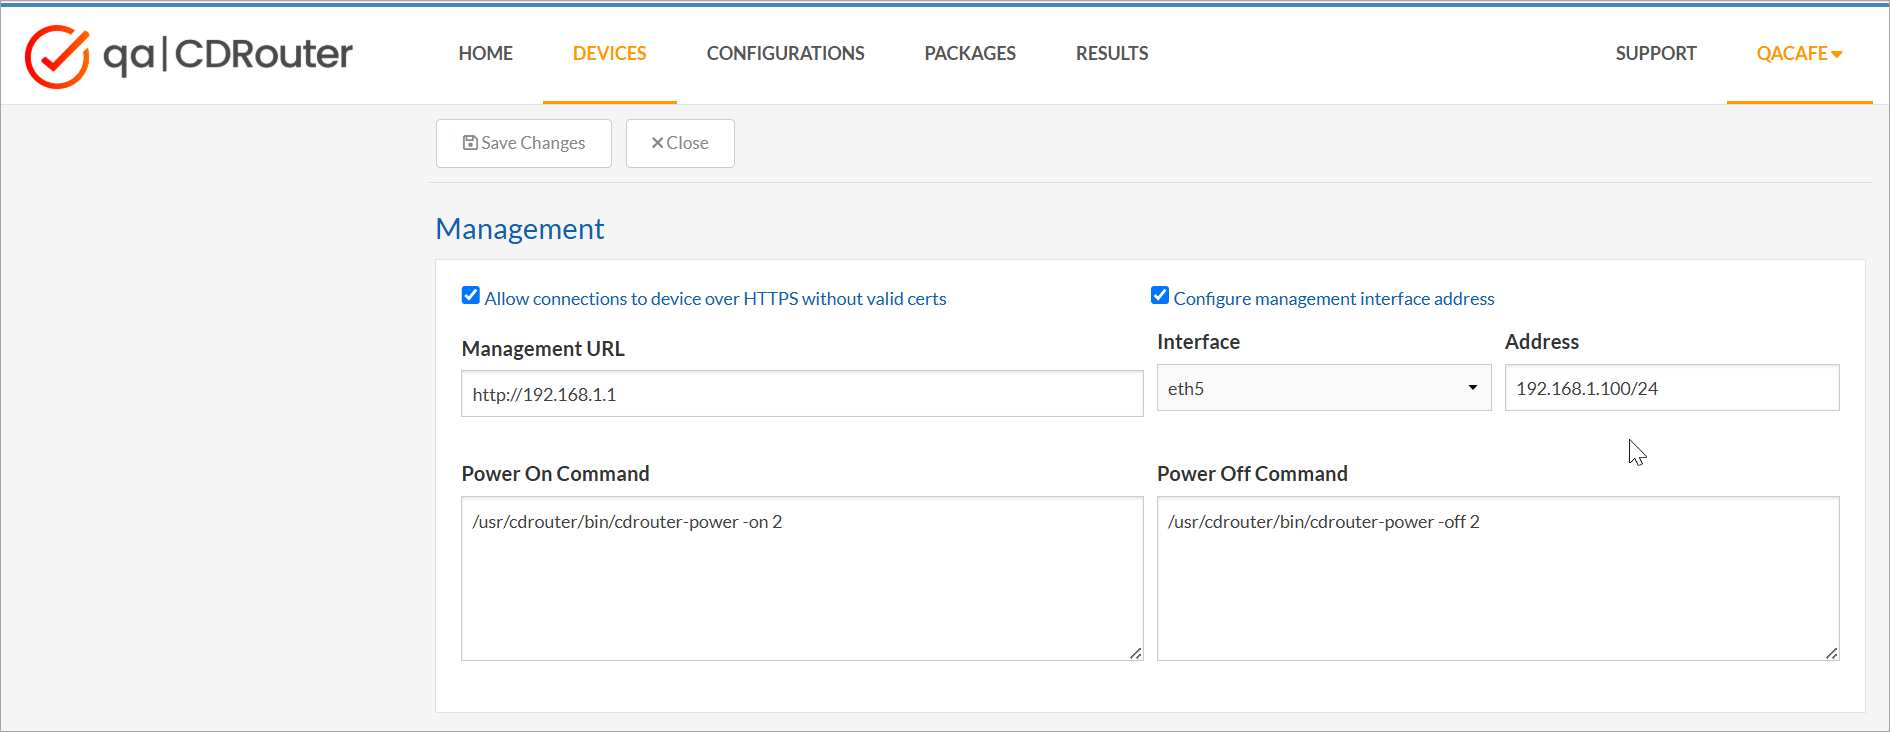
Once this information is saved, you can use the Power On and Power Off buttons to run the associated commands and control power to your device.
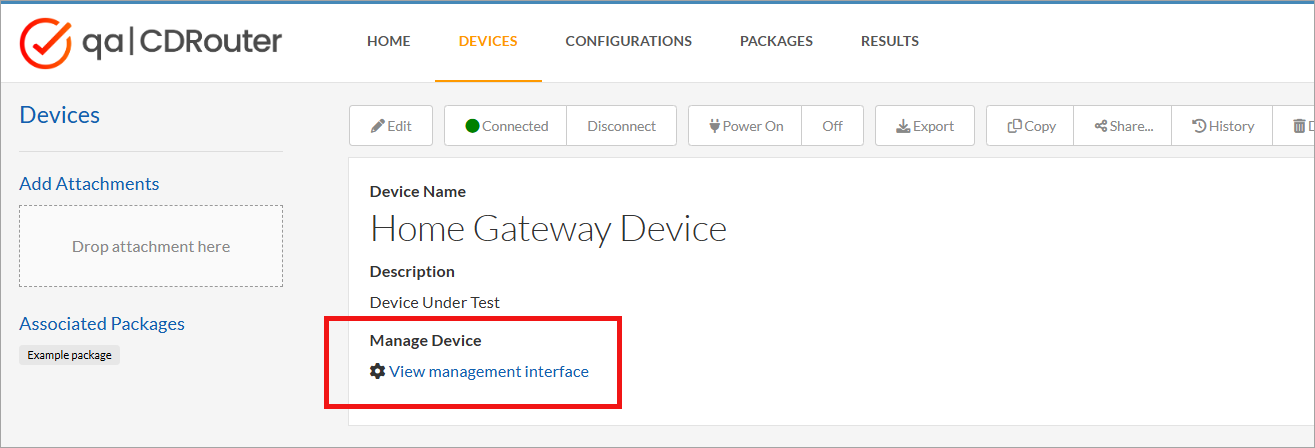
Click the Connect button to configure remote access. This will display the View Management Interface link. Clicking the link opens a new browser tab connected to the device’s web management interface using the URL you specified above.
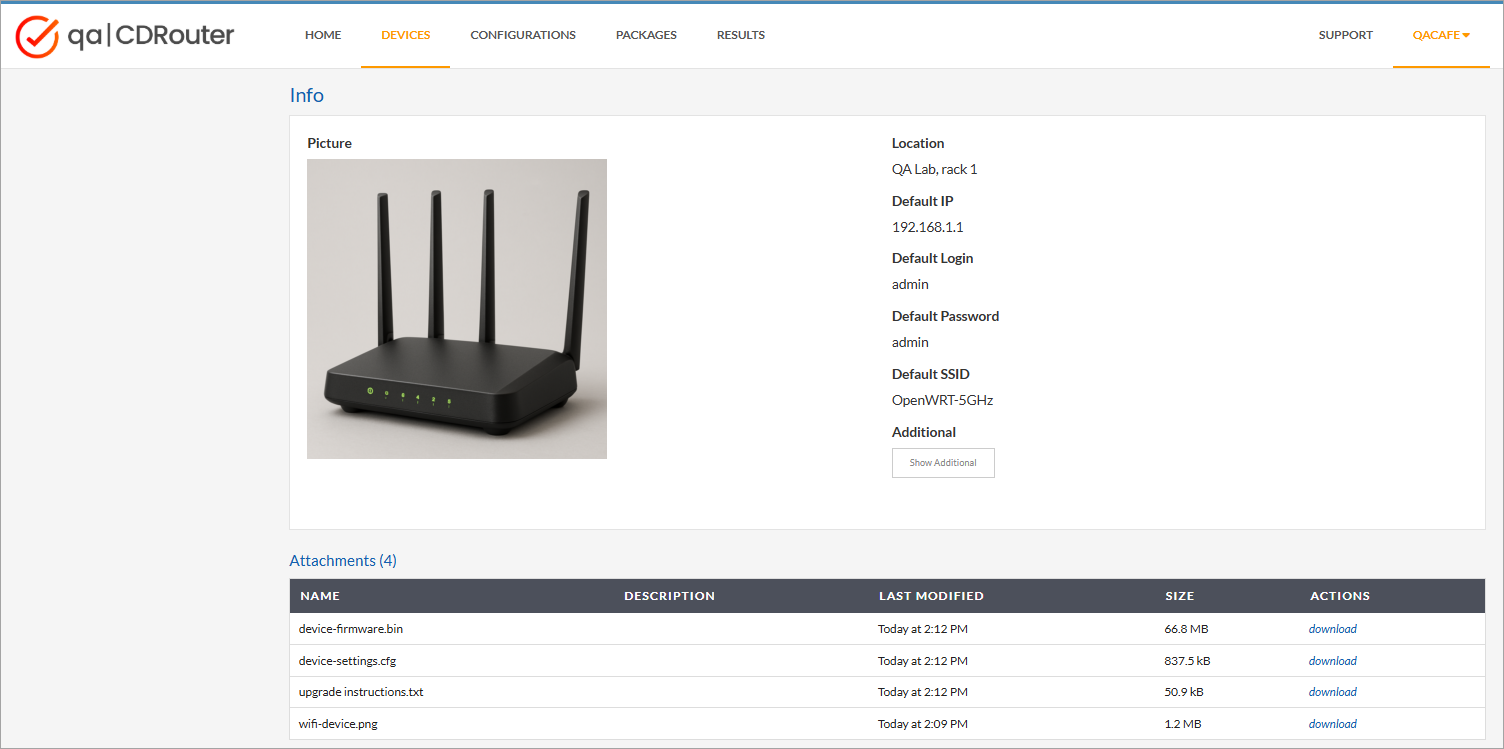
Device Info
The Info section lets you store additional lab-specific information, such as the device’s current location, default IP configuration, and login credentials.
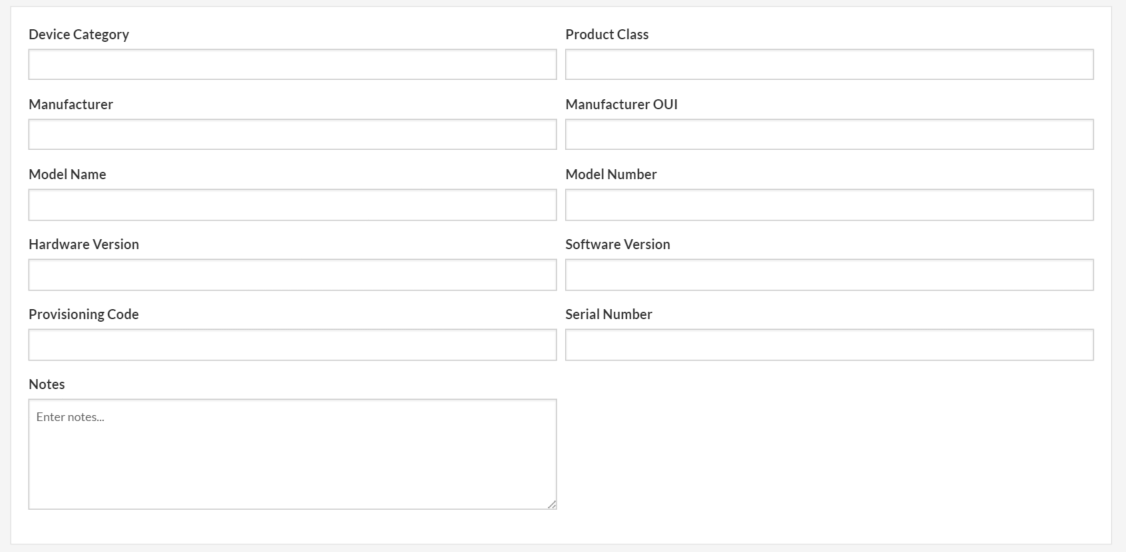
Additional Info
Click the Edit Additional button to expand more fields that help uniquely identify the device:
- Manufacturer
- Model Name
- Hardware Version
- OUI
- Serial Number
- Software Version
Use the Notes field to store any other relevant information. This field supports Markdown formatting, making it easier to organize and format notes clearly.

Attachments and Images
After creating a device, you can upload files and images to keep information related to your device in one place. This may include documentation, screenshots, configuration files, or even firmware images.
Use the Drop attachments here box to upload files and save them with the device.
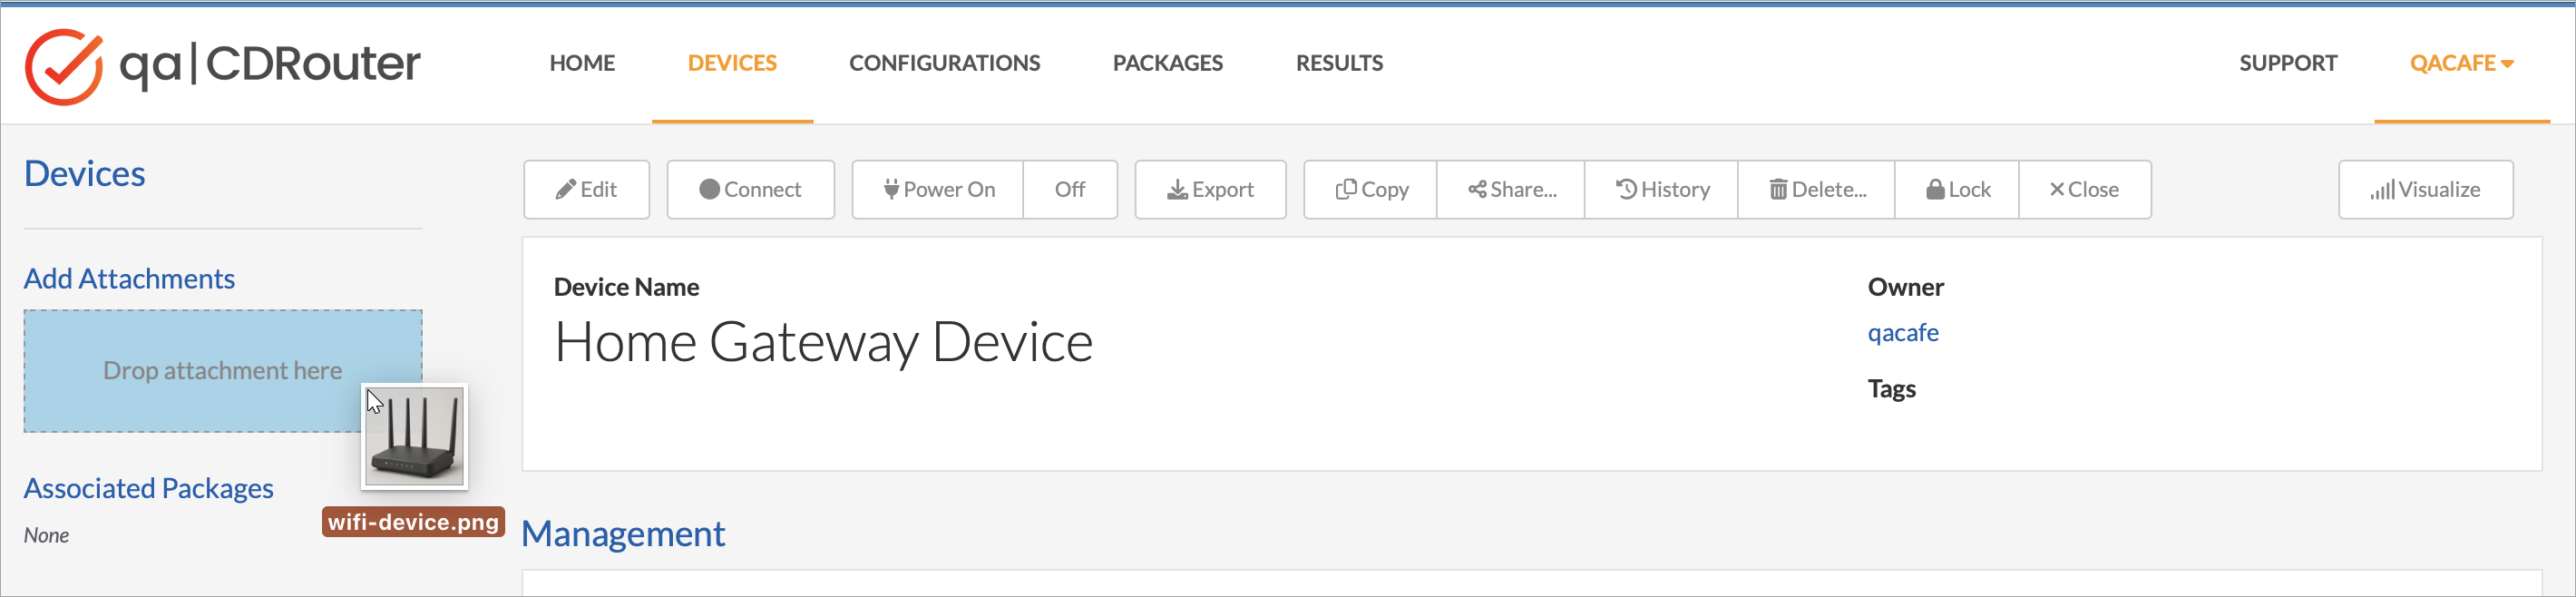
Uploaded items will appear in the Attachments section at the bottom of the page. Open your device in Edit mode to update or remove attachments.
You may also upload an image of the device to display it with the device for easy identification.
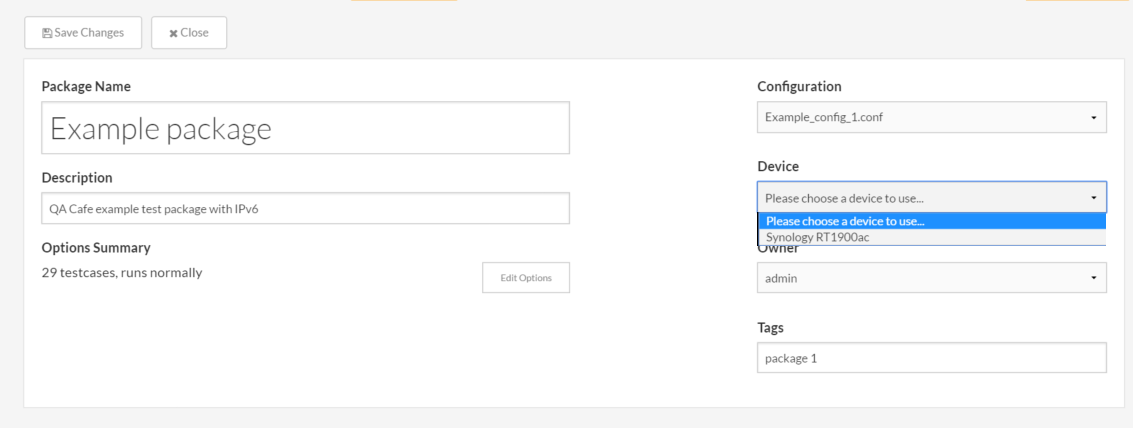
Assigning Devices to Packages
When creating a test package, you can select a device from the device manager to associate with it. All test results generated by that package will be linked to the selected device.
Analyzing Results
Test results associated with a device appear in the device’s Results view.

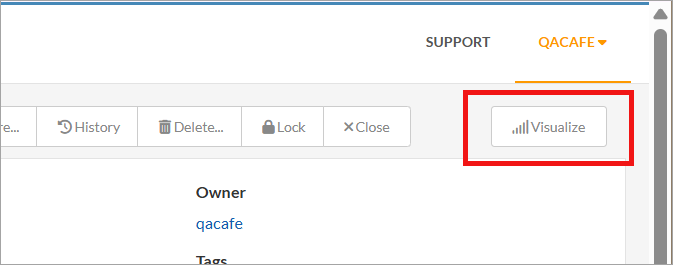
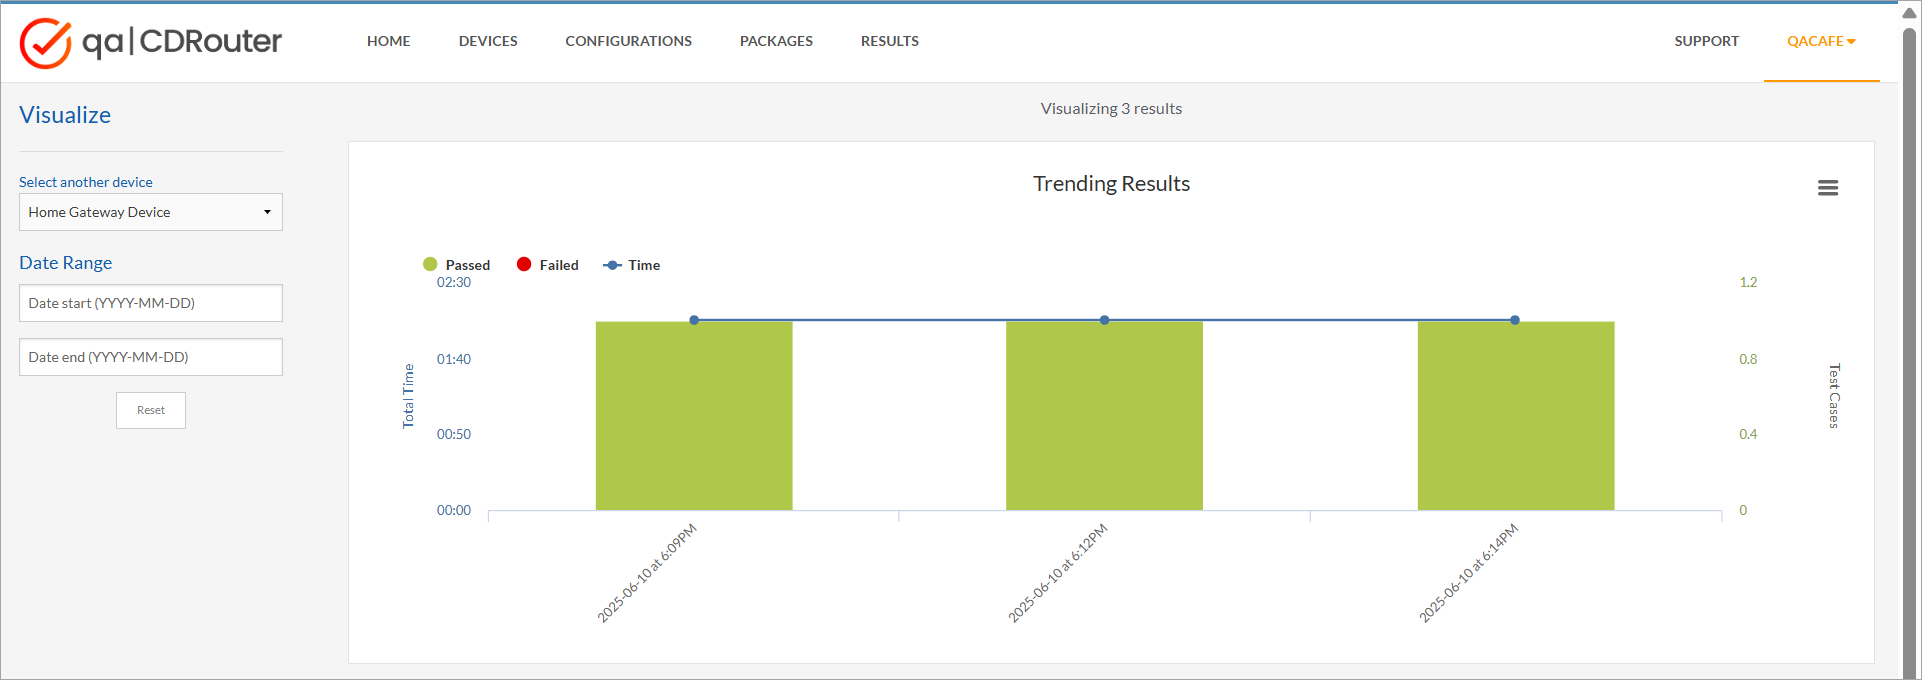
You can also click the Visualize tool from the device view to see trends, performance over time, and other insights across test runs.
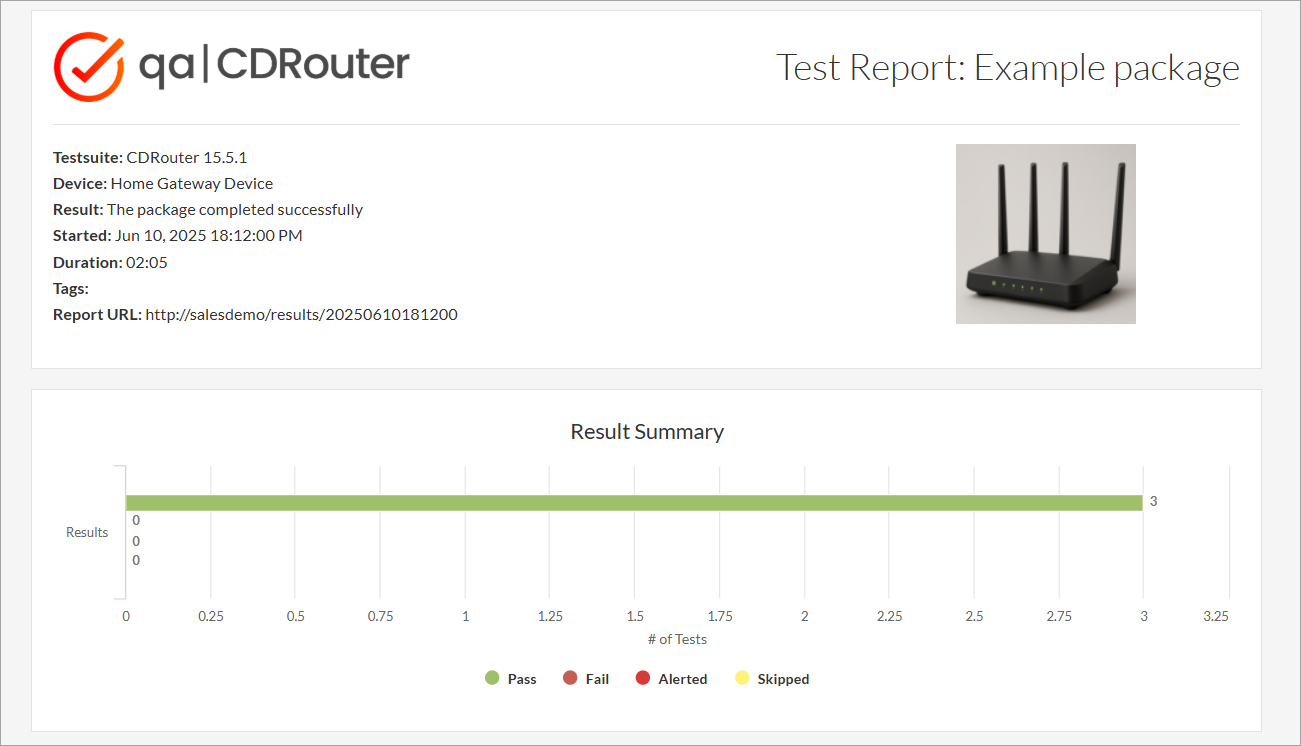
The printable report available with each result will automatically include the device’s details and image, making it easy to share results with your team, management, or customers.