Meraki Packet Capture and Packet Viewer
We’ve decided to pause CS Personal. This allows us to focus our team’s talents where they’ll make the biggest impact: enhancing CloudShark Enterprise for our customers and helping more technology partners integrate Packet Viewer into their platforms.
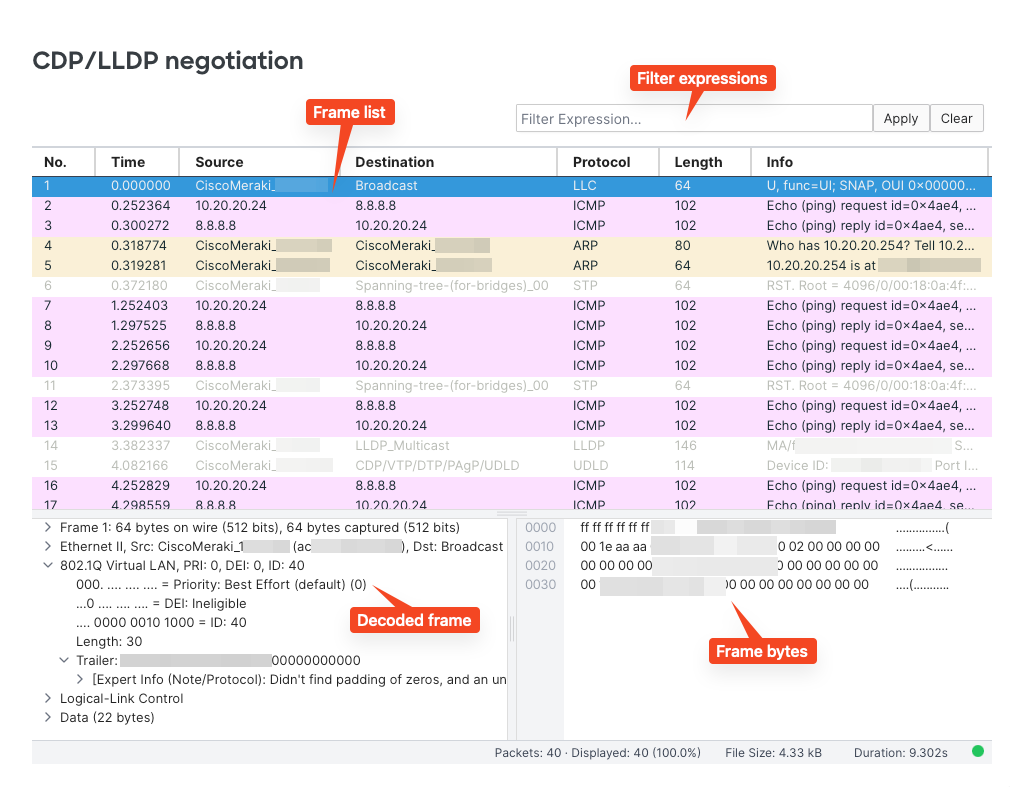
The Cisco Meraki dashboard includes built-in packet capture capabilities powered by Packet Viewer, QA Cafe’s embeddable packet analysis solution. This integration provides Meraki users with a familiar Wireshark-like interface directly within the Meraki Dashboard:
Capturing and Viewing Packets in the Meraki Dashboard
For the official Cisco Meraki documentation on on capturing and analyzing packets with your Meraki devices, see:
Learn More About Packet Viewer
Packet Viewer is available for network and security platforms looking to embed packet analysis into their own products. To learn more, visit the Packet Viewer product page and the Packet Viewer documentation.