CloudShark and OpenWrt
OpenWrt is a Linux distribution designed for embedded devices. It can be installed on a variety of devices including home gateways.
OpenWrt has a package available for CloudShark that allows for capturing and uploading to www.cloudshark.org or a local CloudShark appliance through the web based user interface. This makes it easy to generate network captures to troubleshoot issues.
Installation
The CloudShark package is available in the trunk releases of OpenWrt, named Barrier Breaker. The Beginners’ Guide to OpenWrt and the instructions on choosing a version contain information on installing OpenWrt. Be sure to choose a Barrier Breaker image of OpenWrt to be able to install the CloudShark package for OpenWrt.
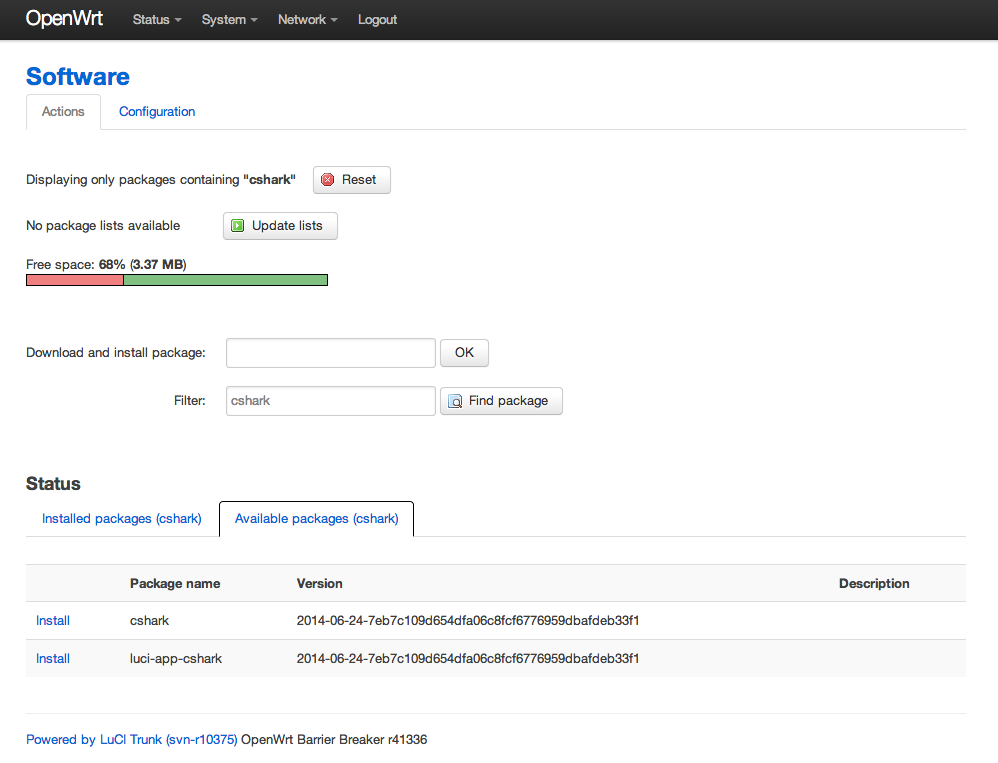
Once OpenWrt is installed on your device you can install the CloudShark packages right from the web interface. Click on the Software button under the System drop down menu.

Find packages using the filter cshark and install both of the
available packages: cshark, and luci-app-cshark.
Configuration
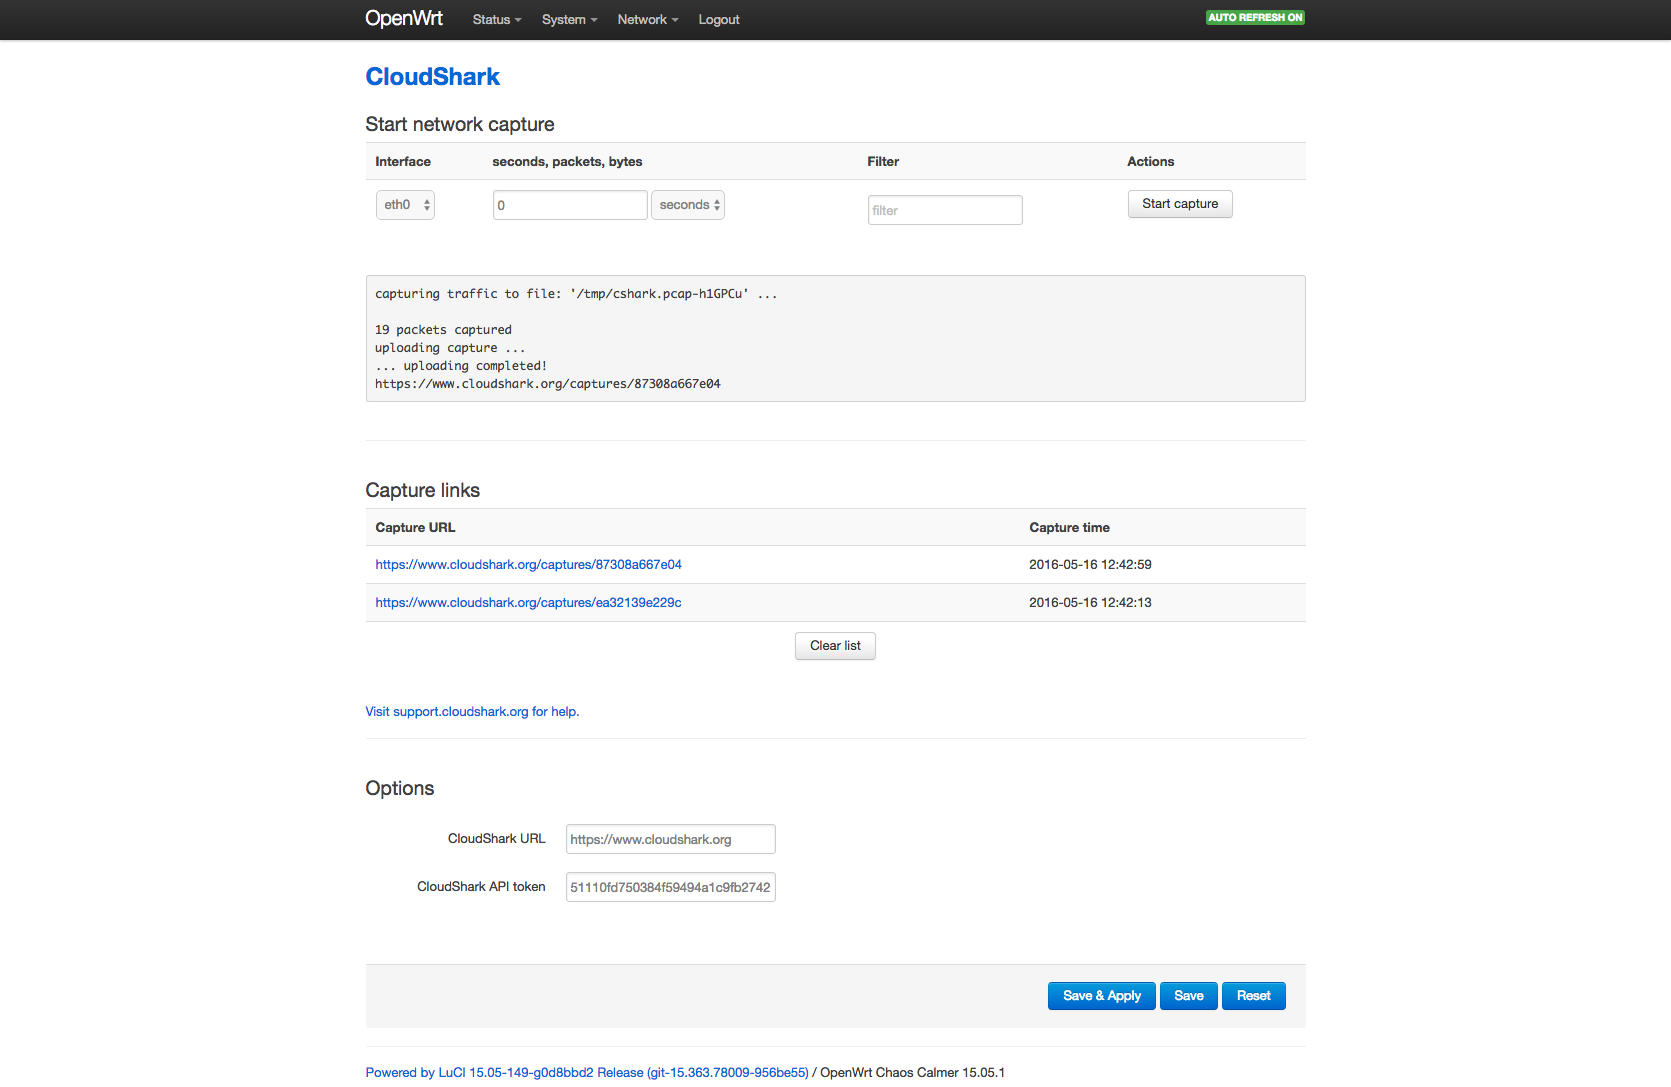
If you are using a hosted account using www.cloudshark.org after installation just login to your CloudShark account and browse to Preferences -> API Tokens to find your API Token. Then on the CloudShark page on your OpenWrt device paste this API Token into the CloudShark API token field under Options.
If you have your own CloudShark appliance you can upload captures from OpenWrt directly to that.
First create an API token to use for your OpenWrt device. You can use this API token to assign the captures you upload to a specific user and optionally tags that you would like the uploaded captures to have.

Now that you have an API token change the CloudShark URL to the url of your appliance and input the api token you created under the Options section.
If you have setup HTTPS access on your CloudShark appliance and are using self-signed certificates please see the Configuration File section to see how to disable certificate validation against the installed CA certificate bundle.
Capturing
After installing the CloudShark package you will be able to browse to the main CloudShark page under the Network drop down menu.

To perform a capture select an interface and click Start Capture. Once you are done capturing click Stop Capture. Your capture file will be automatically uploaded to www.cloudshark.org and a link to your capture will appear under Capture links.
You can also configure your capture to stop after a specific number of seconds, packets or bytes have been received. Specifying any of these as 0 will capture indefinitely until the Stop Capture button is clicked. The size of capture files may be limited by the amount of available memory or disk space. See the section on Capture File Size for more information.
Berkeley Packet Filters can also be used to filter traffic as a capture is being performed.
Check out a capture that we have performed on an OpenWrt home gateway on www.cloudshark.org.
Capturing Wireless Traffic
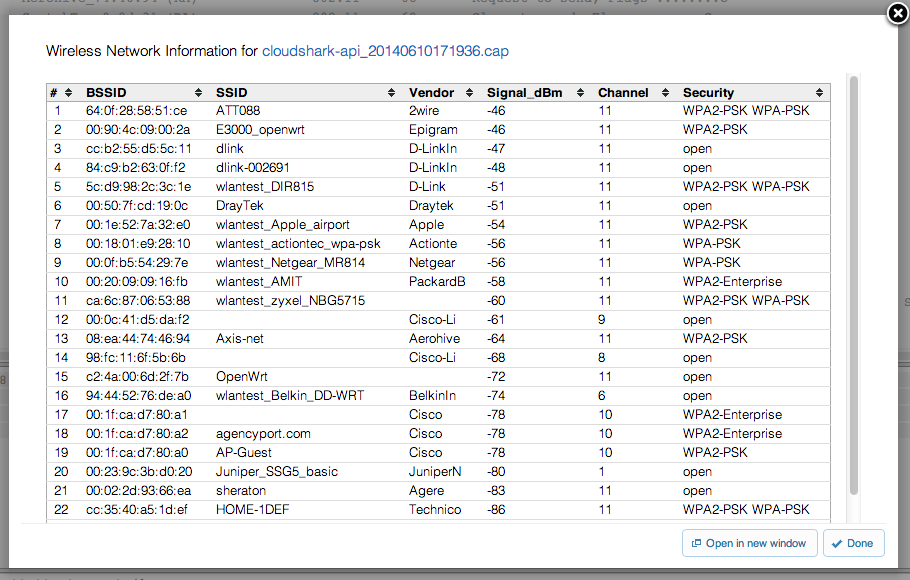
If your wireless driver supports putting an interface in monitor mode you can use it to capture 802.11 management packets. The CloudShark Wireless Networks analysis tool can then be used to view a statistical report of the wireless networks that were broadcasting during the capture.

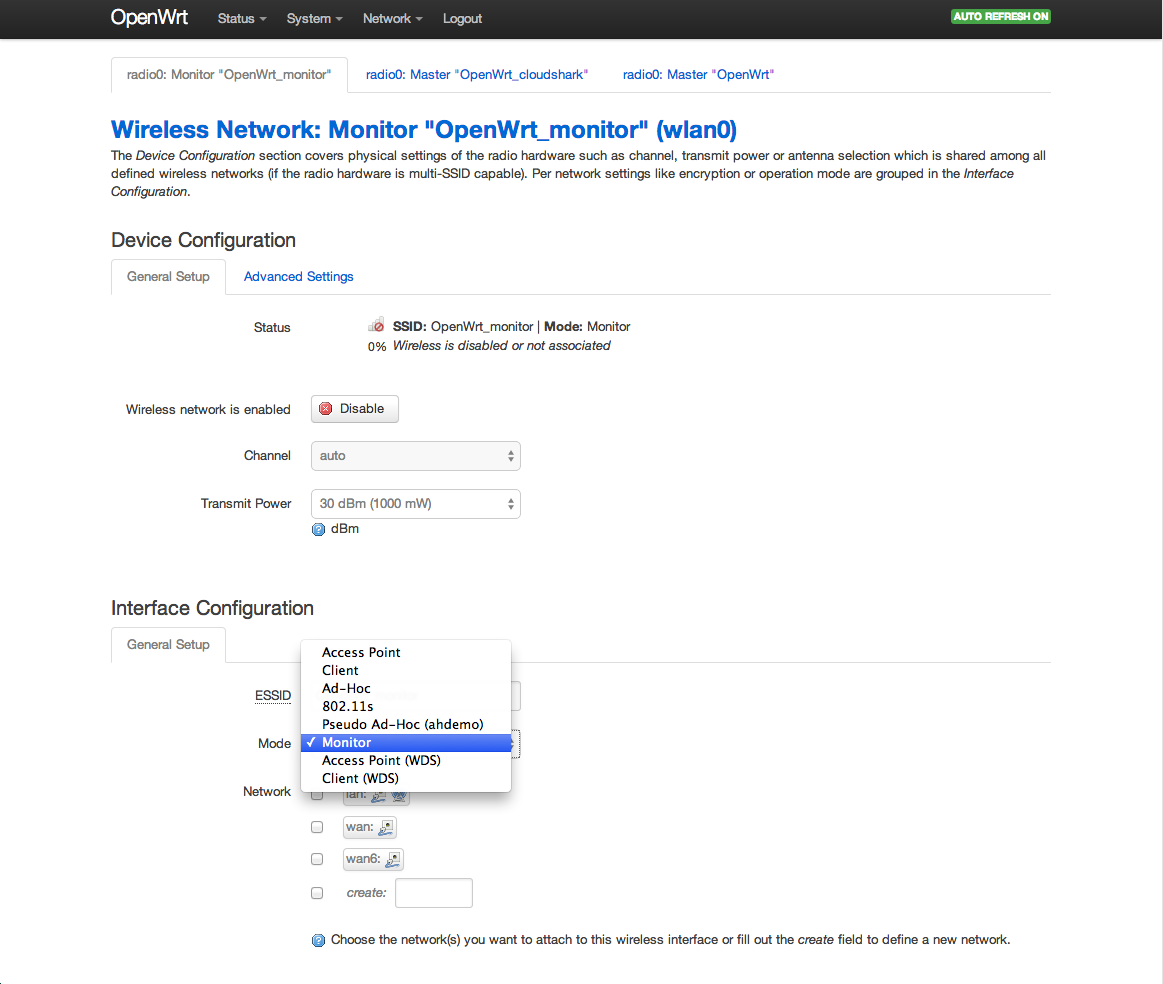
To create an interface in monitor mode login to your OpenWrt device and click the Wifi button under the Network drop down menu.

Add a new network under the wireless device that you would like to use and under the Interface Configuration change the mode to be Monitor.

After creating this network you can view this page again and at the top in parenthesis will be the interface name you should select as the capture interface when capturing in monitor mode.
For more information on the wireless configuration on OpenWrt visit the OpenWrt Wireless configuration wiki page.
Configuration File
Advanced settings can be found in the cshark configuration file which is
located at /etc/config/cshark. Here is the default configuration file:
config cshark 'cshark'
        option token 'PASTE API TOKEN HERE'
        option ca '/etc/ssl/certs/ca-the_usertrust_network.pem'
        option ca_verify '1'
        option dir '/tmp/'
        option url 'https://www.cloudshark.org'
The token and url settings are for uploading your captures to your own CloudShark appliance. See the Appliance Configuration section for more information on these options.
The ca and ca_verify options control how the device validates certificates when uploading captures over https. To change the certificates to validate against, upload a new certificate and change the ca option to the location of the new certificate. To turn of certificate validation completely change the ca_verify option to 0.
As a capture is running a temporary capture file is create in the /tmp/ directory and once the capture is done this capture file is uploaded to CloudShark and deleted. The dir option can be used to change the directory that these temporary captures are stored.
Capture File Size
Many of the embedded devices that will be running OpenWrt have a small amount of storage space. Because a temporary capture file is stored on the device itself this will limit the size of the capture that may be performed. The network capture will stop automatically when the device runs low on disk space. The capture is then uploaded to CloudShark and the temporary capture file is deleted.
USB Drive Support
The CloudShark package for OpenWrt also supports saving its temporary capture files to a USB storage device to allow for larger captures. To perform this first you will need to configure your OpenWrt device for USB storage. Once this is complete you can specify a new directory to save temporary capture files to by following the instructions in the Configuration File section.
Note that you may run into issues when performing very large captures due to the limited memory on many OpenWrt devices. In this case the CloudShark package may run out of memory when trying to upload the capture to a CloudShark appliance. If you are running into issues while performing large captures consider adding a swap partition to your USB storage device. The OpenWrt wiki includes an example of adding a Linux swap partition using a USB drive.
Developers
The OpenWrt packages for CloudShark are available on GitHub. Got an idea for a feature? Send us a pull request