CDRouter Quick Start Guide
Introduction
Welcome to the world of CDRouter! Congratulations on purchasing the leading test tool for CPE devices and broadband access gateways!
This guide will help you connect CDRouter to your device and set up a basic test configuration so that you can begin running tests.
When you are finished with this guide, the following links will help you learn more advanced CDRouter configurations:
-
User Guide - Full documentation for CDRouter and other expansion test suites, like IPv6 and TR-069.
-
CDRouter Training Videos - Check out our collection of training videos covering basics as well as more advanced topics from other CDRouter Expansion test suites.
-
Knowledge Base - Articles containing guides for unique test configurations and tips to help you get the most out of CDRouter.
If at any time you have any questions or would like assistance, please contact us at support@qacafe.com.
Before you begin
It is important to keep CDRouter up to date to make sure you have the latest tests and features. New CDRouter updates are released about every four weeks. To update your system, follow the instructions in the CDRouter Installation and Upgrade Guide.
Physical Connections
Basic Setup
Before you can run tests you must connect the device under test (DUT) to CDRouter as shown in the diagram below.
-
You may select any of the Ethernet or Wi-Fi test interfaces for your testing. The names are listed below the interfaces on the system chassis. Details about CDRouter’s test interfaces and their capabilities can be found in the NTA3000 Data Sheet
-
If you purchased the Advanced Accessory Pack, connect the Synaccess SynLink power distribution unit (PDU) to the NTA3000 to automatically power your test devices on and off when needed. Refer to the Synaccess SynLink PDU knowledge base article for details on how to properly connect and operate the PDU during your testing.

Complex Setups
CDRouter can be used to test devices with DSL, DOCSIS or other types of WAN connections provided they are connected through a media gateway (DSLAM, CMTS, etc.).
For more information, please refer to these articles in our Knowledge Base for details and examples.
- DOCSIS Cable Gateway Testing in a Shared Lab Environment
- DSL Testing with CDRouter
- Connecting to CDRouter through multiple routers
- VLAN tagging in CDRouter
Connecting to CDRouter
CDRouter provides a convenient web-based user interface for configuring and running tests. The web UI can be reached from any web browser that has access to your CDRouter system.
For example, if your CDRouter host system has an IP address of 10.0.0.5,
point your browser to the following URL:
http://10.0.0.5/
Check the LCD panel on the front of your NTA system to find its management IP address. See the NTA3000 Quick Start Guide for more details on managing your system.
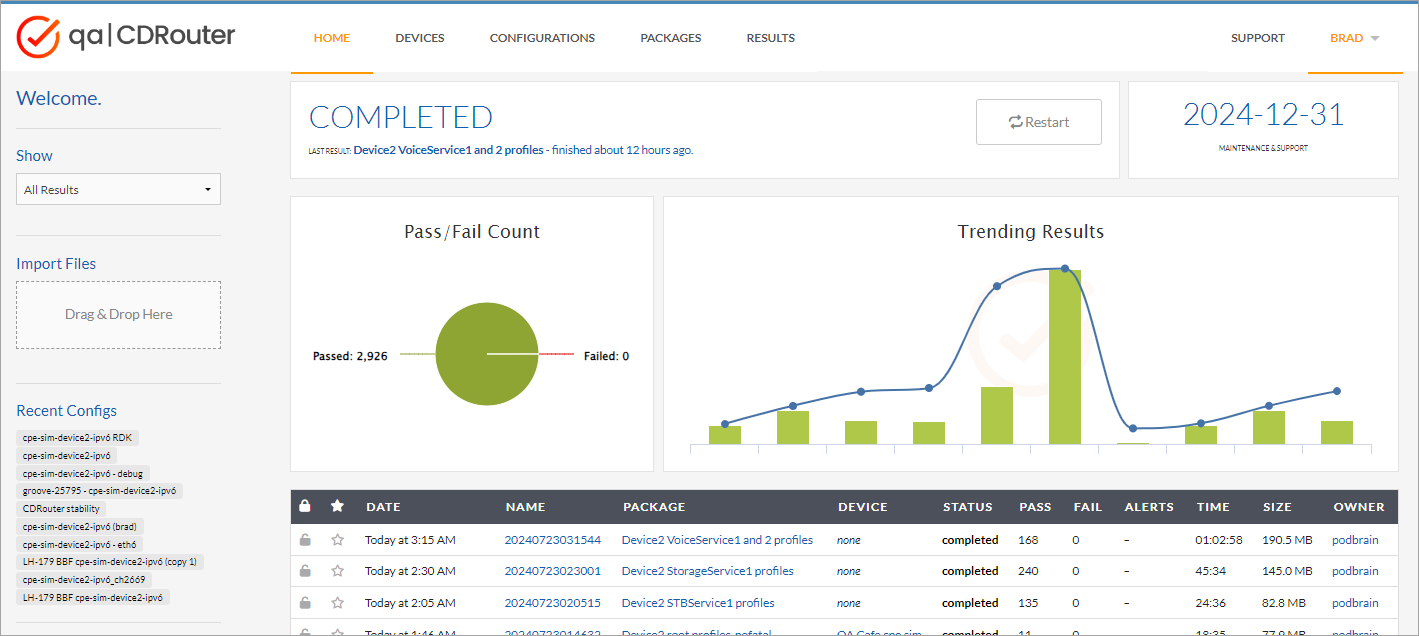
Home Page
The home page provides a dashboard with a summary of recent test results. Information on this page is continually updated, allowing you to monitor how well the latest tests are performing and quickly jump to results that interest you.
The Devices, Configurations, and Packages tabs are where you’ll configure CDRouter to run all of your tests which will be stored in the Results tab.
Adding Users
When you connect to CDRouter for the first time, you will automatically be logged in as the “admin” user. This is a permanent user that cannot be deleted.
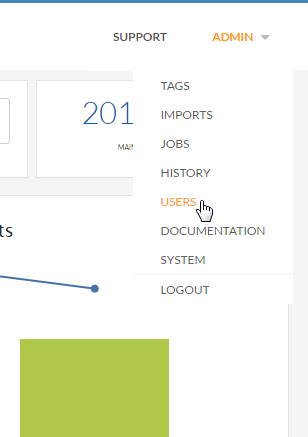
To add other users, select Users from the Admin dropdown menu in the upper- right corner. (Note that the dropdown menu is always labeled with the user currently logged in.)
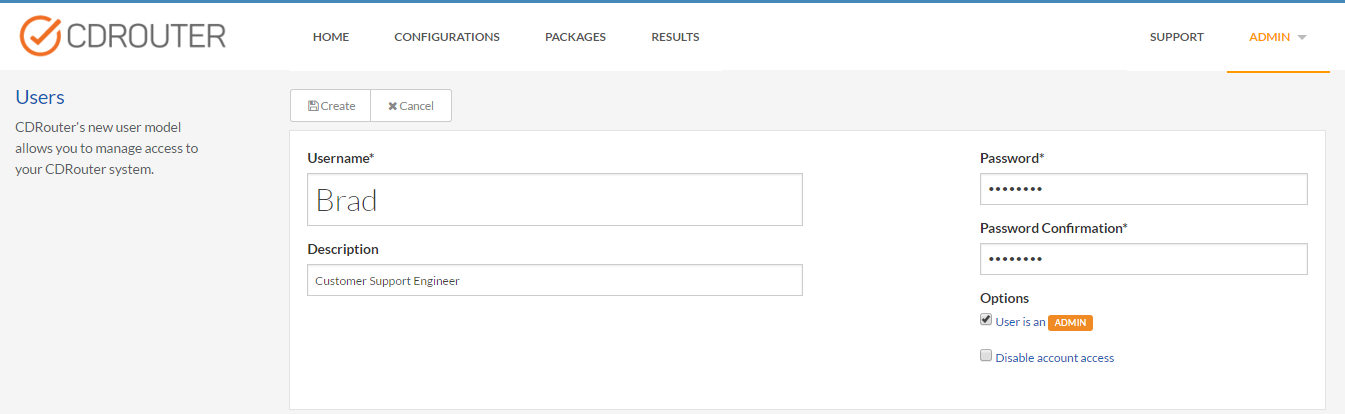
Click the New button to create a new user and set their password.
Be sure to select the “User is an ADMIN” box as well. All users with this box set have all of the administrative rights that the “admin” user has. They may view and edit all resources on the system regardless of who owns them.
Users without ADMIN status may only view results and other resources that have been explicitly shared with them.
To allow other users to login to CDRouter, you will need to disable automatic logins on the Users page. This will cause CDRouter to prompt all for a username and password in order to access the system.
Important: Before disabling automatic logins, make sure the “admin” user’s password has been set!

Automatic login can also be re-enabled to prevent CDRouter from prompting for a login username/password. When automatic login is enabled, all connections are automatically logged in as the “admin” user. All existing user accounts will still exist, and the “admin” user may change the ownership of any test results or configuration resources to another user. Otherwise, all additional user accounts cannot be used while automatic login is enabled.
System Information
Select System from the Admin menu to view information about your system, upgrade to the latest version of CDRouter, or update your license.
See the CDRouter System Page article for more details.
Setup and Test Execution
To begin testing with CDRouter, you will need to create a Test Package that contains all of the test cases you wish to run, and run-time options which control the flow of the tests are executed.
Your test package will also need to specify a Configuration which describes the DUT and the test environment, and a Device to represent the device being tested.
CDRouter creates a set of Test Results for every test package that is launched. The test results contain detailed logs of each test case that is executed, packet capture files and a snapshot of the Package, Configuration, and the Device used during testing.
Use the navigation tabs at the top of the screen to reach the page for each component. By default, CDRouter only shows information that is owned by the user who is logged in. Admin users can use the filters on the left side of the screen to display resources owned by other users.

The sections below will guide you through the steps required to create a simple configuration file and test package, launch a test run against a connected device, and analyze the results.
Creating A Configuration File
Config files contain all of the settings that CDRouter uses to create a complete virtual network environment for testing your DUT. This includes DHCP clients on the LAN as well as servers on the WAN to provide all the necessary network services to run CDRouter’s tests.
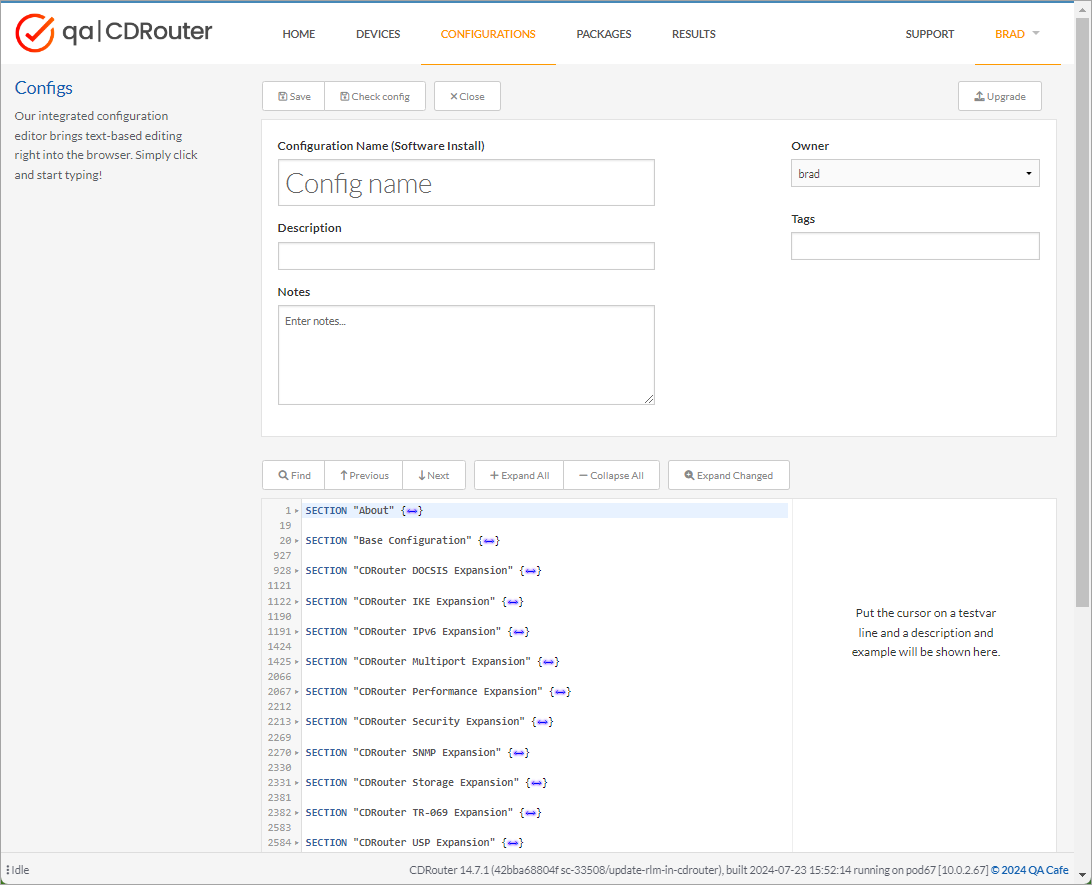
To create a new config file, go to the Configurations page and click the “New” button to open CDRouter’s configuration editor.
New config files are populated with a default configuration template, which is grouped into a hierarchy of Sections according to their functionality. Within these sections are Testvars that can be modified to customize the network environment and provide information that CDRouter needs about your device.
Testvars and Testvar Groups
The Base Configuration section contains all of the IPv4 settings used by CDRouter’s base test suite that comes with every system, as well as global settings that apply to all test environments.
Each of the other sections contains settings for the available CDRouter Expansion test suites, to provide additional test coverage for your devices.
Collapsed sections can be expanded by clicking the arrow in the left margin (▶), or in between the curly braces at the end of the line ({↔}).
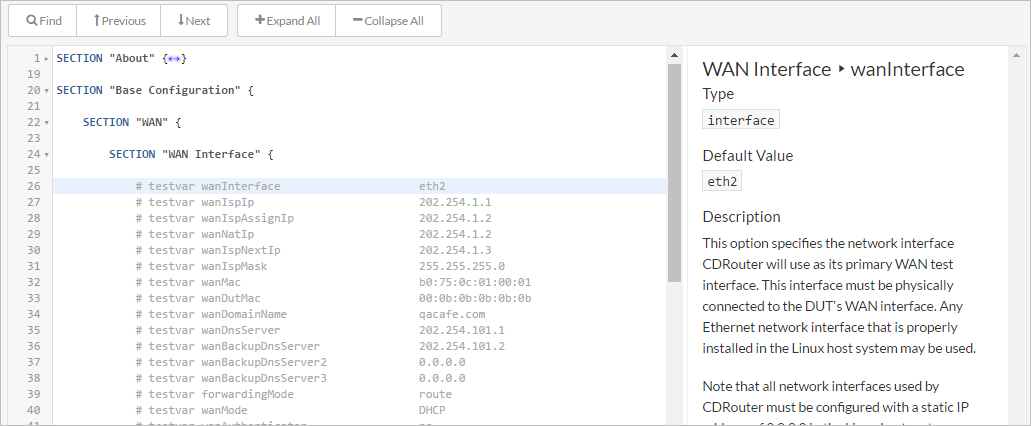
Within each section are individual settings, called testvars, that specify configuration details related to the DUT and features it supports. They also also specify parameters CDRouter uses to create and configure network services such as DNS, DHCP, CWMP, etc.
Click on any testvar to display information about it, including its description, syntax, and default value.
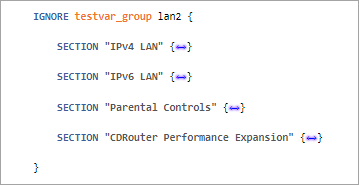
Some testvars are grouped together within a named testvar_group. These are used to define additional interfaces, users, and other entities within the config file.
When a new config file is created, all testvars are commented out with the hash symbol (’#’).
Most testvars do not need to be explicitly defined in order to be used during testing. When a testvar is commented out (or deleted), CDRouter will automatically use its default value if it has one.
The default values defined for each testvar are intended to work for the most typical devices and environments, which helps minimize the number of testvars that need to be set in order to create a working config file.
Default Configuration
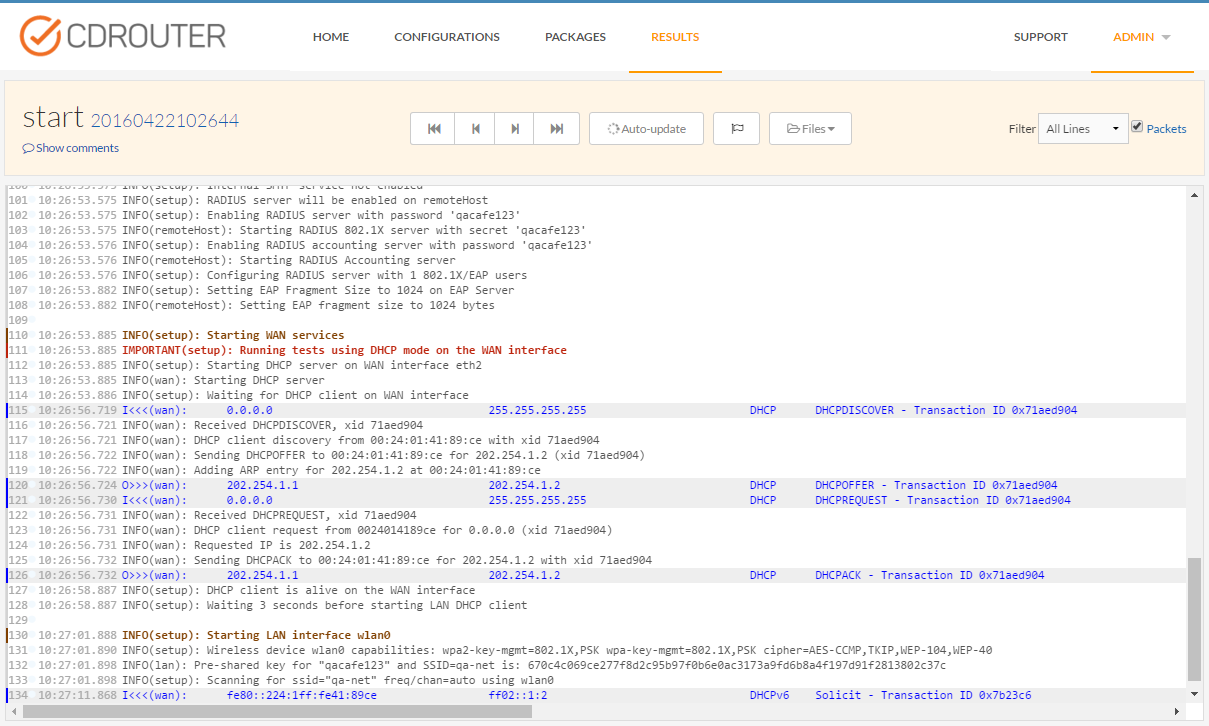
Below are some of the testvar settings CDRouter will use to set up the WAN and LAN interfaces for your device. These settings should work with most simple Ethernet home routers.
By default, CDRouter will assume your DUT’s WAN port is connected to the eth2 interface and will be requesting an IP address via DHCP. CDRouter’s DHCP server will assign an IP address, default router, and DNS servers to your device automatically.
It also assumes eth1 is attached to one of the device’s LAN ports, and will create a virtual DHCP client to request an address.
SECTION "Base Configuration" {
    SECTION "WAN" {
        SECTION "WAN Interface" {
            testvar wanInterface           eth2
            testvar wanMode                DHCP
            testvar wanIspIp               202.254.1.1
            testvar wanIspAssignIp         202.254.1.2
            testvar wanIspMask             255.255.255.0
            testvar forwardingMode         route
        }
        SECTION "WAN DNS" {
            testvar wanDnsServer           202.254.101.1
            testvar wanBackupDnsServer     202.254.101.2
        }

    SECTION "LAN" {
        SECTION "LAN Interface" {
            testvar lanInterface           eth1
            testvar lanMode                DHCP
            testvar lanIp                  192.168.1.1
            testvar lanMask
        }
        SECTION "DHCP Client" {
            testvar dhcpClientStart        192.168.1.2
            testvar dhcpClientEnd          192.168.1.254
        }
    }
}
Here is what each of the testvars above tells CDRouter about the network and your device. Update any settings as needed to match your DUT’s configuration:
| Testvar | Description |
|---|---|
|
CDRouter’s eth2 interface is connected to DUT’s WAN port |
|
DUT uses DHCP on the WAN to obtain an IPv4 address, default router, and DNS server configuration. |
|
IP address of CDRouter’s DHCP server on the WAN (CDRouter will also assign this address as the DUT’s default router) |
|
IP address assigned to the DUT |
|
Subnet mask assigned to the DUT |
|
DUT performs NAT translation when forwarding between LAN and WAN interfaces |
|
First DNS server assigned to the DUT |
|
Second DNS server assigned to the DUT |
|
CDRouter’s eth1 interface is connected to DUT’s LAN port |
|
DUT runs a DHCP server on the LAN to configure clients |
|
DUT’s LAN IP address is 192.168.1.1 |
|
DUT’s LAN Subnet mask is 255.255.255.0 |
|
Security enabled on DUT’s LAN interface |
|
Starting address of DUT’s DHCP address pool is 192.168.1.2 |
|
Ending address of DUT’s DHCP address pool is 192.168.1.254 |
PPPoE WAN Connection
If your DUT uses PPPoE for its WAN connection, set the
wanMode testvar to “PPPoE” to switch CDRouter’s
WAN connection from DHCP to PPPoE.
Configure PPPoE authentication and other settings in the “PPPoE Server” section of the config file to match your DUT’s settings. Most other testvars can be left set to their default values.
SECTION "Base Configuration" {
    SECTION "WAN" {
        SECTION "WAN Interface" {
            testvar wanMode                PPPoE
            testvar wanIspIp               202.254.1.1
            testvar wanIspAssignIp         202.254.1.2
        }

        SECTION "PPPoE Server" {
            testvar pppoeUser              qacafe
            testvar pppoePassword          qacafe123
            testvar pppoeAcName            qacafe-ac
            testvar pppoeServiceName       any
        }
    }
}
Here is what each of these testvars tells CDRouter about your DUT’s PPPoE configuration.
Update any settings as needed to ensure your device can connect to the PPPoE server.
| Testvar | Description |
|---|---|
|
CDRouter’s PPPoE Server will negotiate WAN connection with the DUT |
|
IP address assigned to CDRouter’s WAN interface |
|
IP address assigned to DUT’s WAN interface |
|
Username expected by PPPoE server |
|
Password expected by PPPoE server |
|
Access Concentrator Name (AC-Name) tag assigned by PPPoE server |
|
Service Name tag assigned by PPPoE server (DUT may require this) |
Wireless LAN Configuration
CDRouter can connect and run tests against your DUT over Wi-Fi in a wide variety of configurations.
See the Configuring Wireless LAN Interfaces article in our Knowledge Base for detailed configuration examples.
Creating A Device
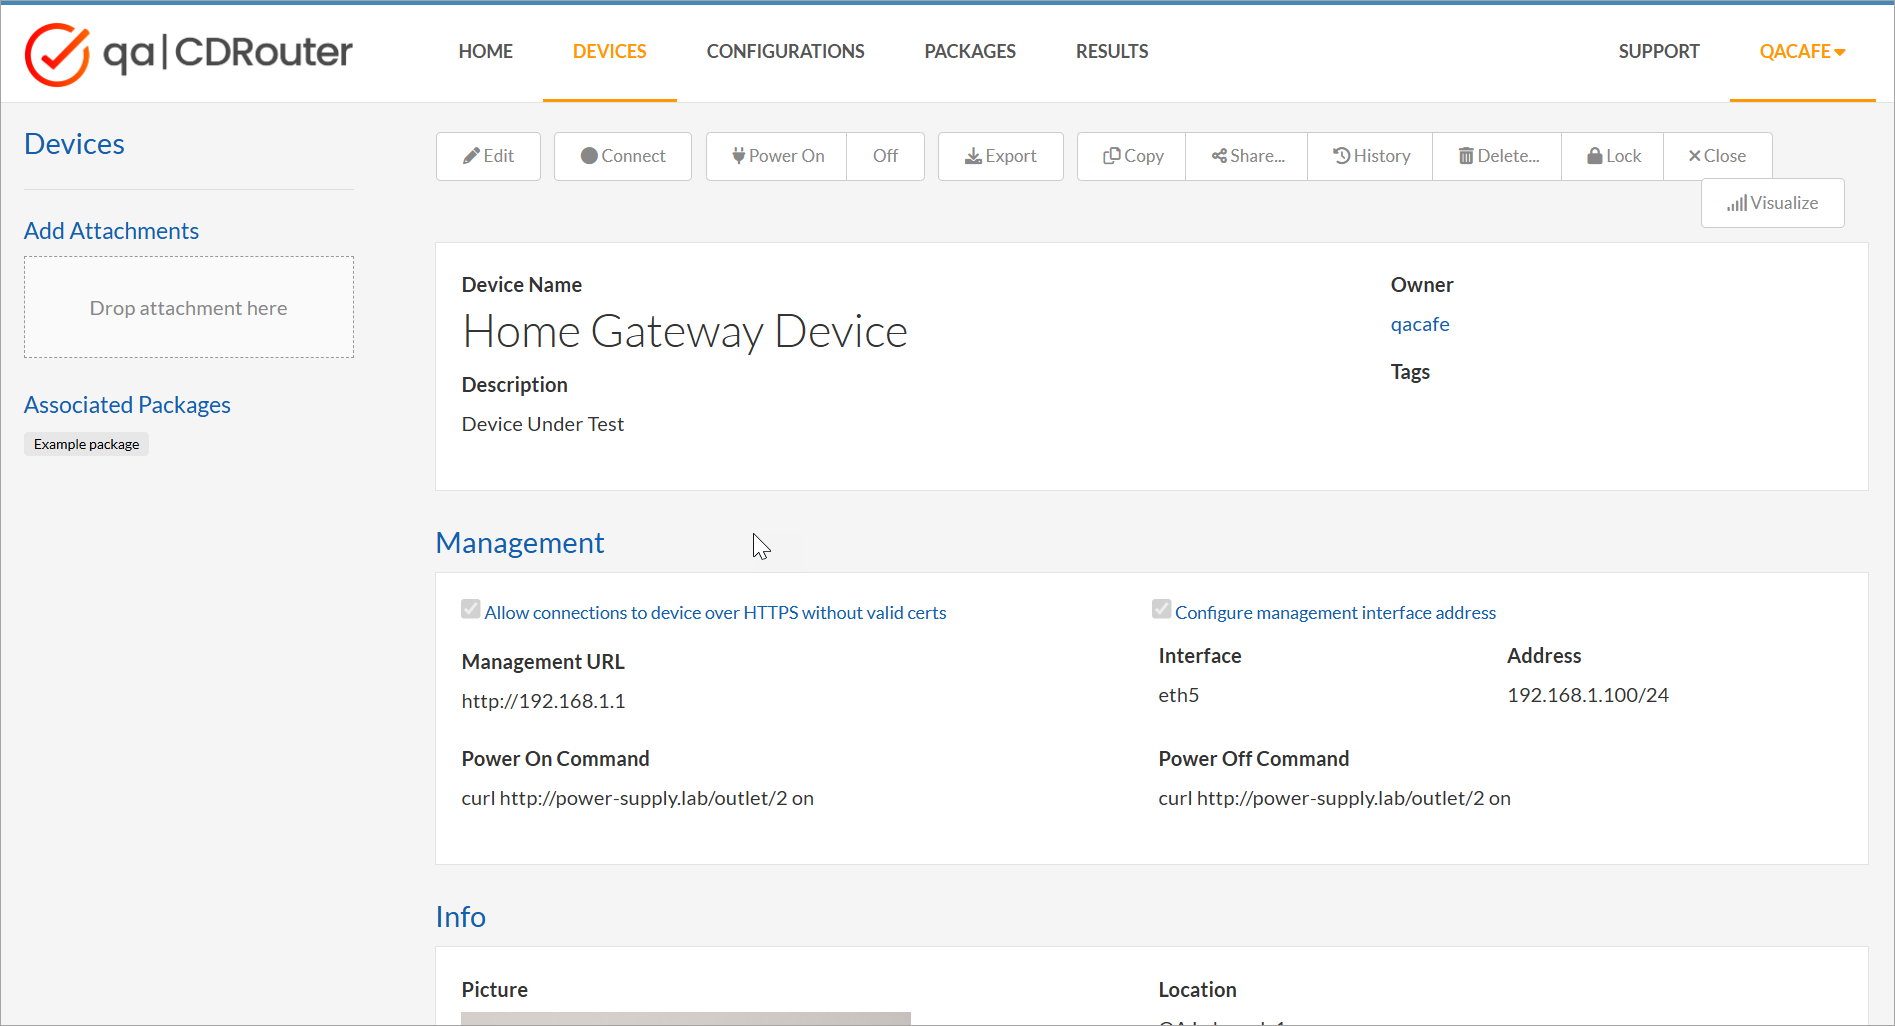
The Devices page allows you to represent the devices you are testing so you can quickly run your tests and identify the results for any device in your network.
Additionally, Devices in CDRouter allow you to access your device remotely and store files with it so you can upgrade and make configuration changes without having to disrupt your test environment.
Click the New button to open the device editor and enter any important details about your device that you would like to keep handy.
See the CDRouter Device Manager article for more details about uploading attachments and configuring remote management.
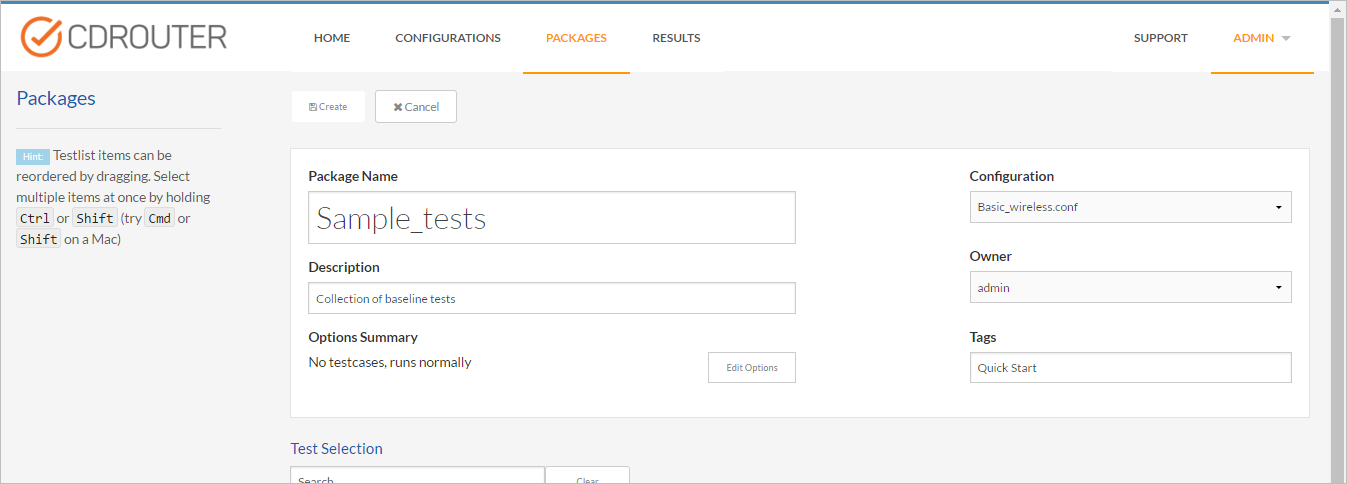
Creating A Test Package
The Packages page is where tests are selected to be executed against your DUT. Each package is paired with a Configuration and Device you have previously created that corresponds to the device you are testing.
Click the New button to open the package editor and begin creating a new package.
In the top section, type a name for your test package and select a Configuration and Device from the drop-down menus on the right.
Select the tests you want to run by selecting them from the Test Selection section at the bottom and clicking Add tests to add them to the Testlist section at the bottom of the page. You can select individual tests or add entire modules or expansions all at once.
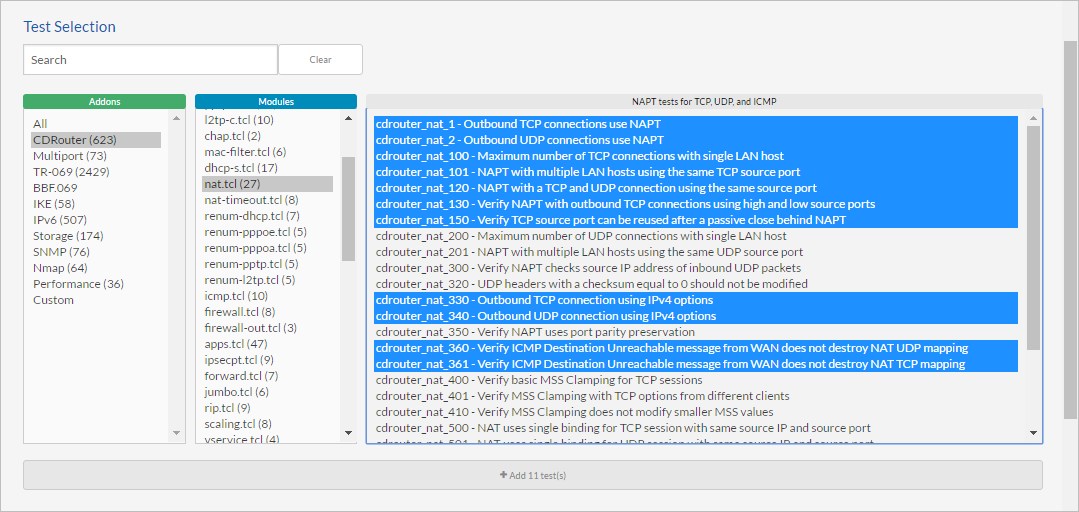
Tests will be executed in the order they appear in the Selected Tests section of the test package. Modules and expansions added as a group will be placed in this section as a bundle that can be moved around as a single item. It is also possible to unbundle modules and expansions and rearrange test cases individually.
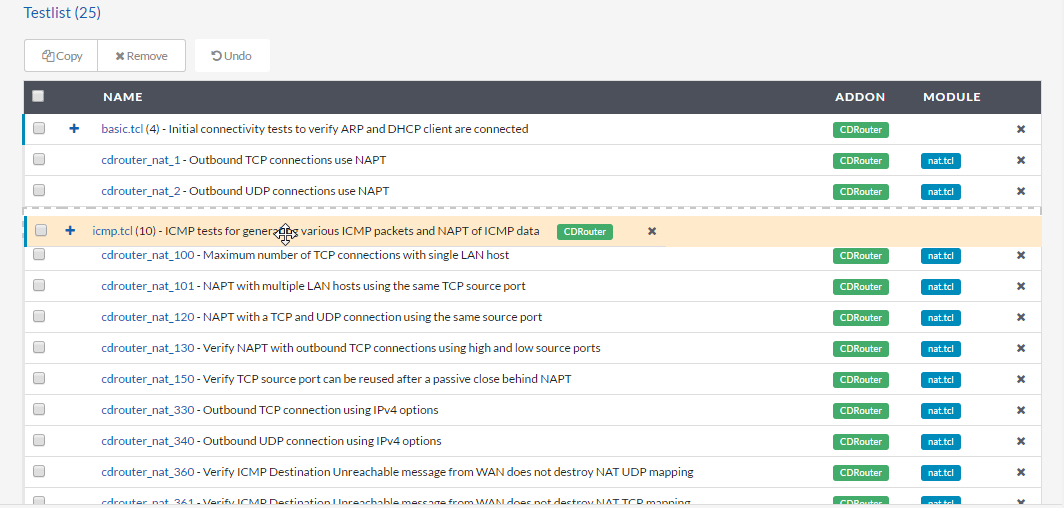
For your first test package we recommend using one of the pre-defined Testlists that come pre-installed with CDRouter.
Testlists can be added and rearranged in the Selected Tests section in the same manner as expansions, modules, and individual test cases.
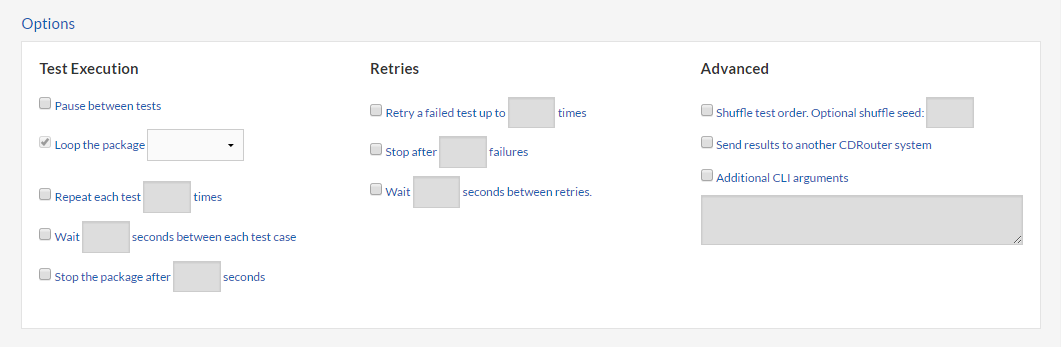
By default, CDRouter executes each test one time in the order they are listed. Click the Edit Options button to enable additional parameters that control the execution and repetition of tests in a variety of ways.
Click Create to save the test package and add it to the Packages page.
Launching Test Packages
Once your test package has been saved, click the Launch button to begin running your tests.
You can also launch several test packages by selecting them on the Packages page and clicking the Launch button.
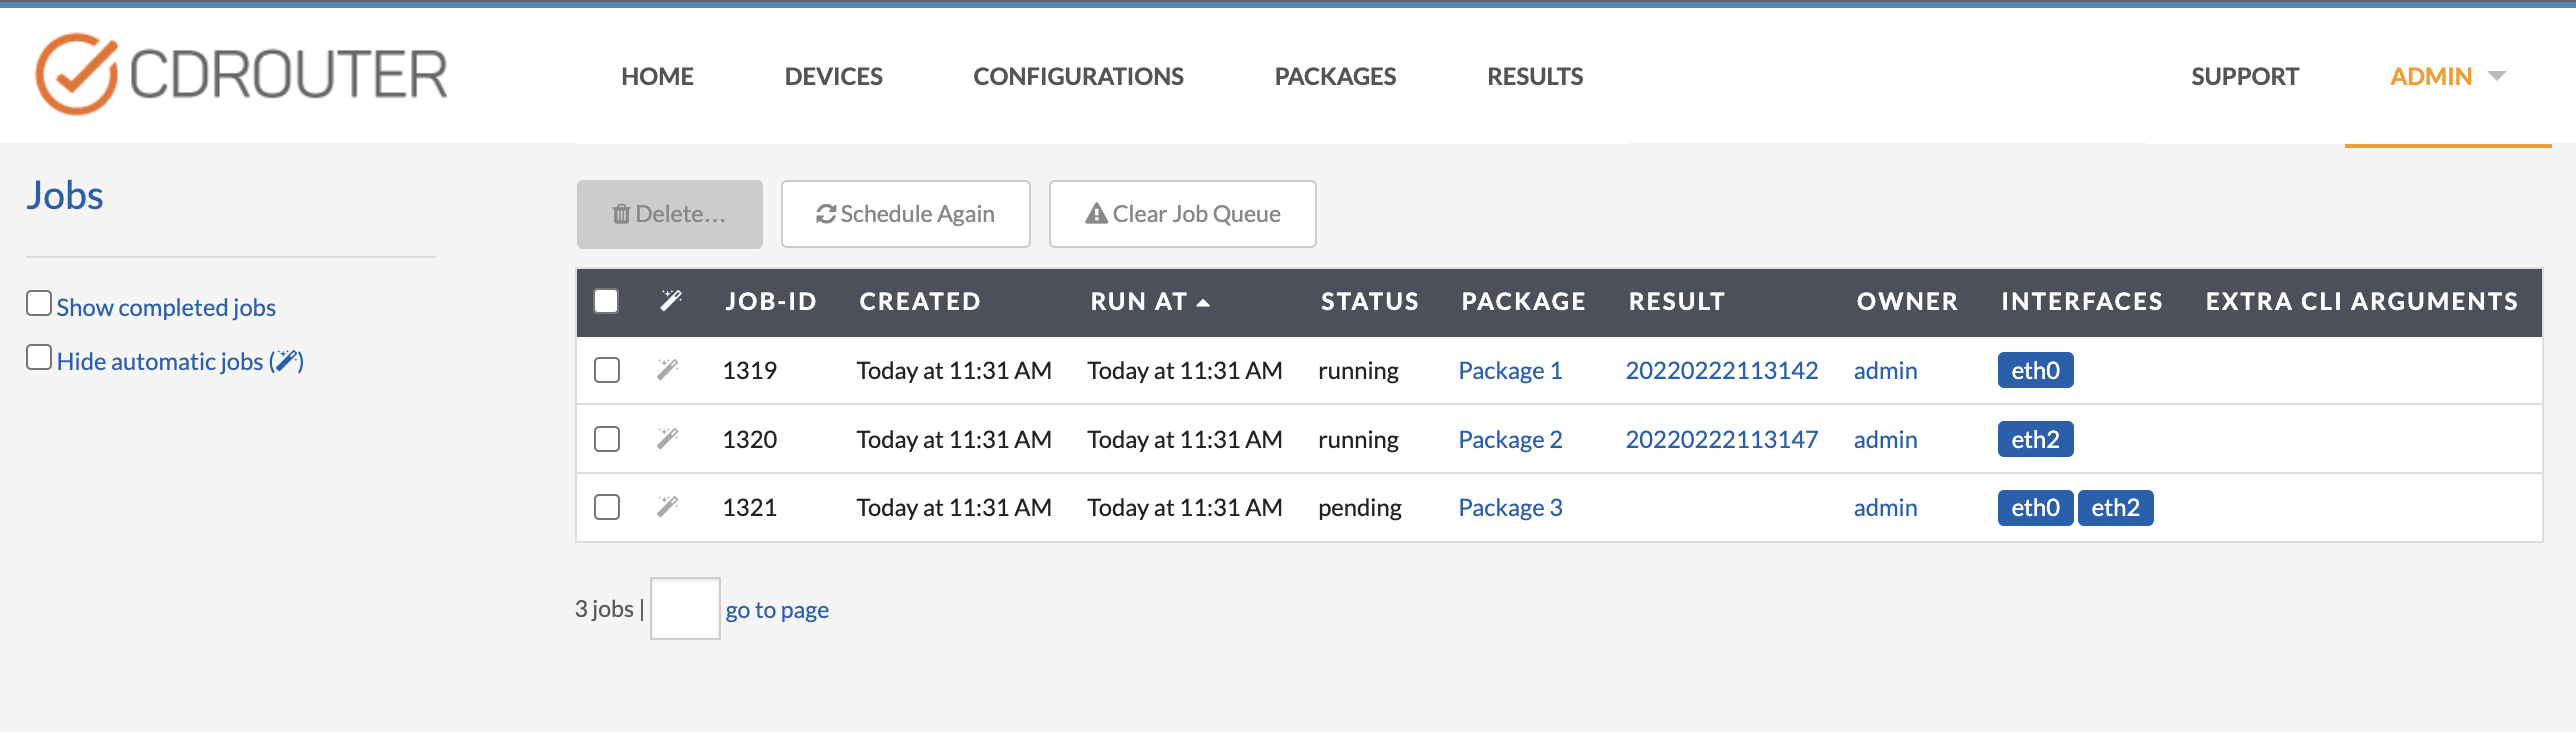
Whenever any test package is launched, it is added to CDRouter’s Job Queue. To view the job queue, select Jobs from the user’s dropdown menu in the upper-right corner.
For CDRouter 13.0 and above, When multiple test instances are available, CDRouter will run test packages
CDRouter is able to execute multiple jobs in parallel, allowing you to test multiple devices at the same time. Each test package must use separate sets of physical interfaces, and at most one package with a wireless interface can run at a time. Parallel testing is limited by the number of test instances available in your CDRouter license. For example, if your license has four test instances, up to four packages can be run simultaneously. For more information and pointers on running high volume testing, see the “Running multiple packages at once” article in our Knowledge Base.
Analyzing Test Results
After launching your test package, you can monitor progress from the Results page. By default, the most recent test results are listed first. Test results are named with a timestamp representing the date and time the test package was executed.
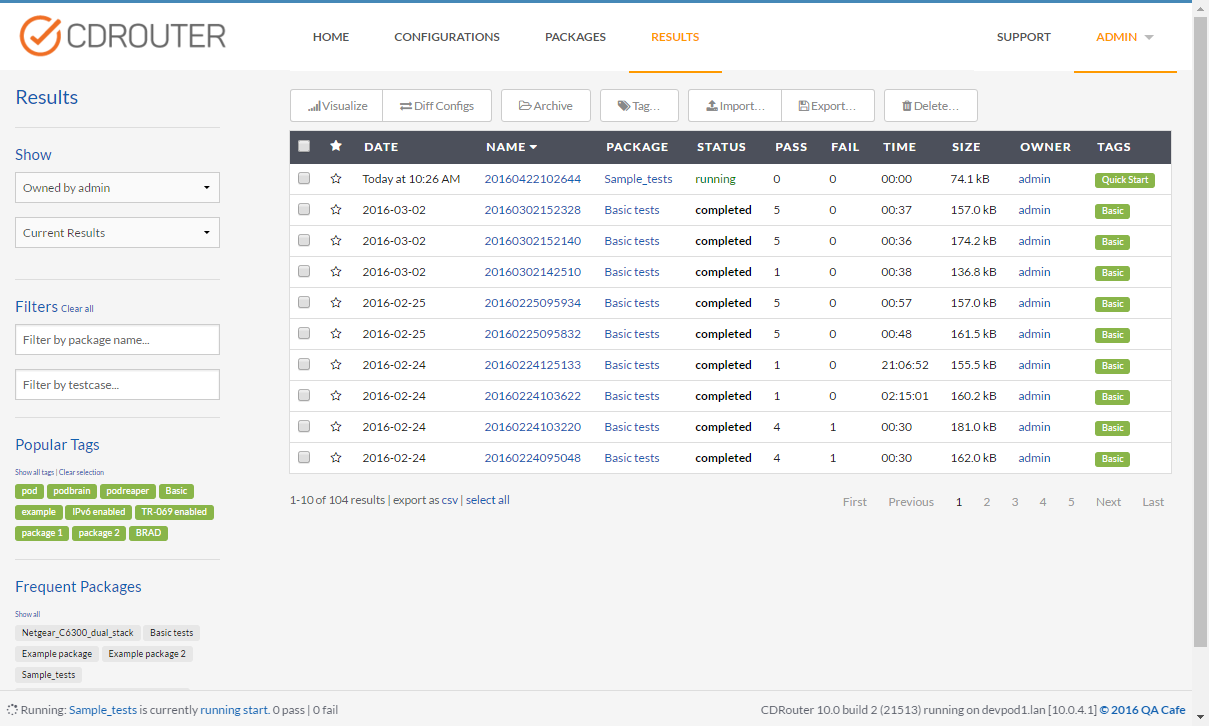
Note that if you launch a test package while other tests are running, it will be added to the job queue, and will not appear on the Results page until it actually starts.
Click the test result name of the test package you just executed to view the test execution in real-time. From the Results page you can view the detailed results, open the results folder, print a report, or export the results directory for a particular test package. The Results page also displays a summary of the number of tests that passed and failed, and the test duration.
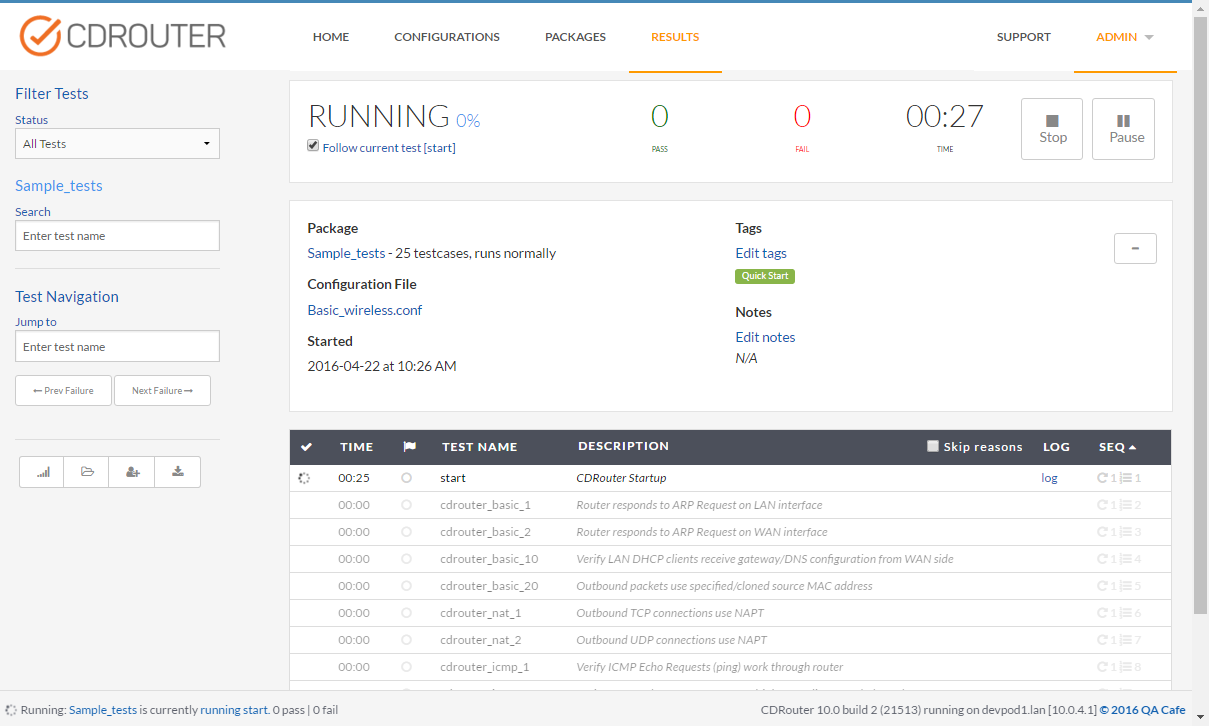
Click the Log link next to each test case to view the detailed log file and analyze the results. The log includes all of the test activity including inline packet decodes of all traffic sent and received during the test. You can add annotations and highlighting to individual lines to keep a record of your analysis and collaborate with other users.